I remember the night I almost gave up on mac and cheese. The pot was simmering, the cheese was clumping, and my roommate had just ordered a pizza. I was about to toss the pasta in a bowl and call it a day when I found a forgotten jar of Gruyère in the back of my fridge and a craving for something that would make the whole house smell like a cozy cabin. That moment turned into a culinary revelation, and I realized I had stumbled onto the ultimate baked mac and cheese recipe. I dare you to taste this and not go back for seconds.
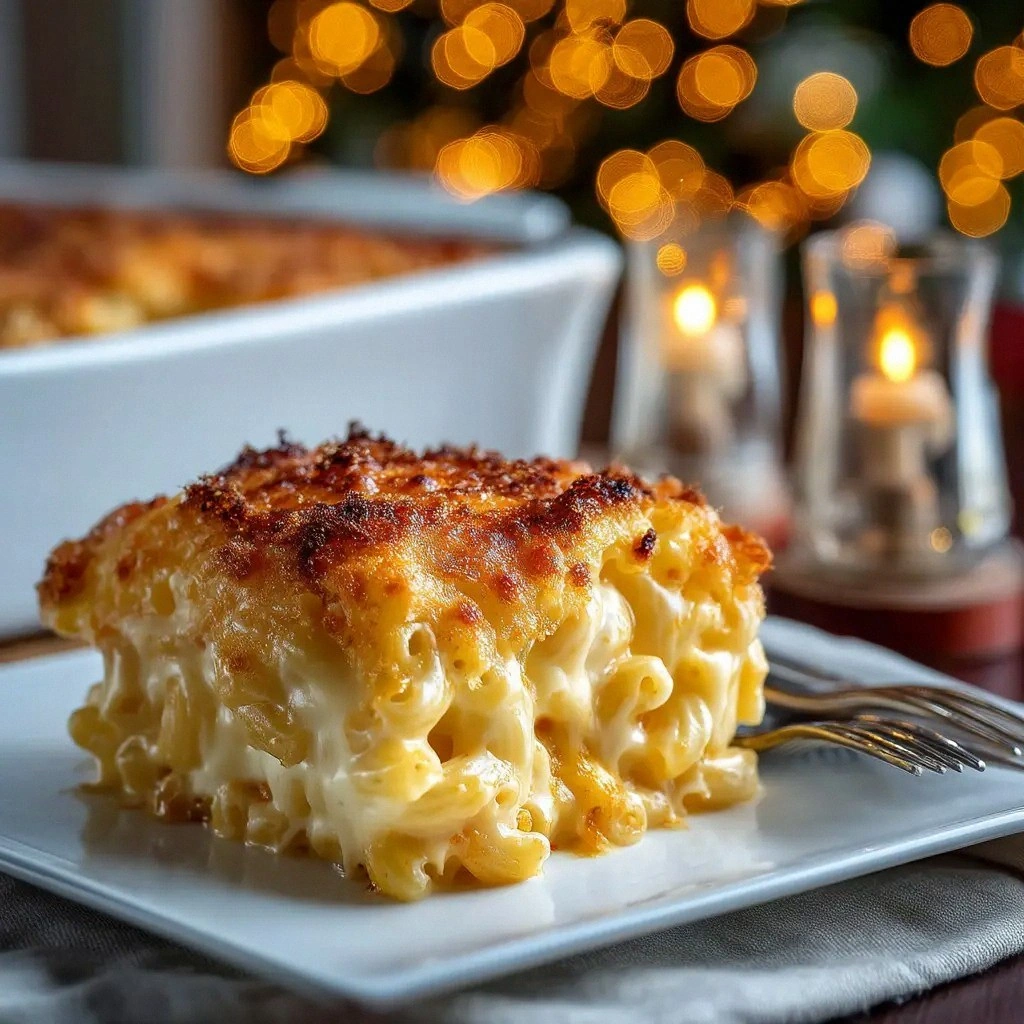
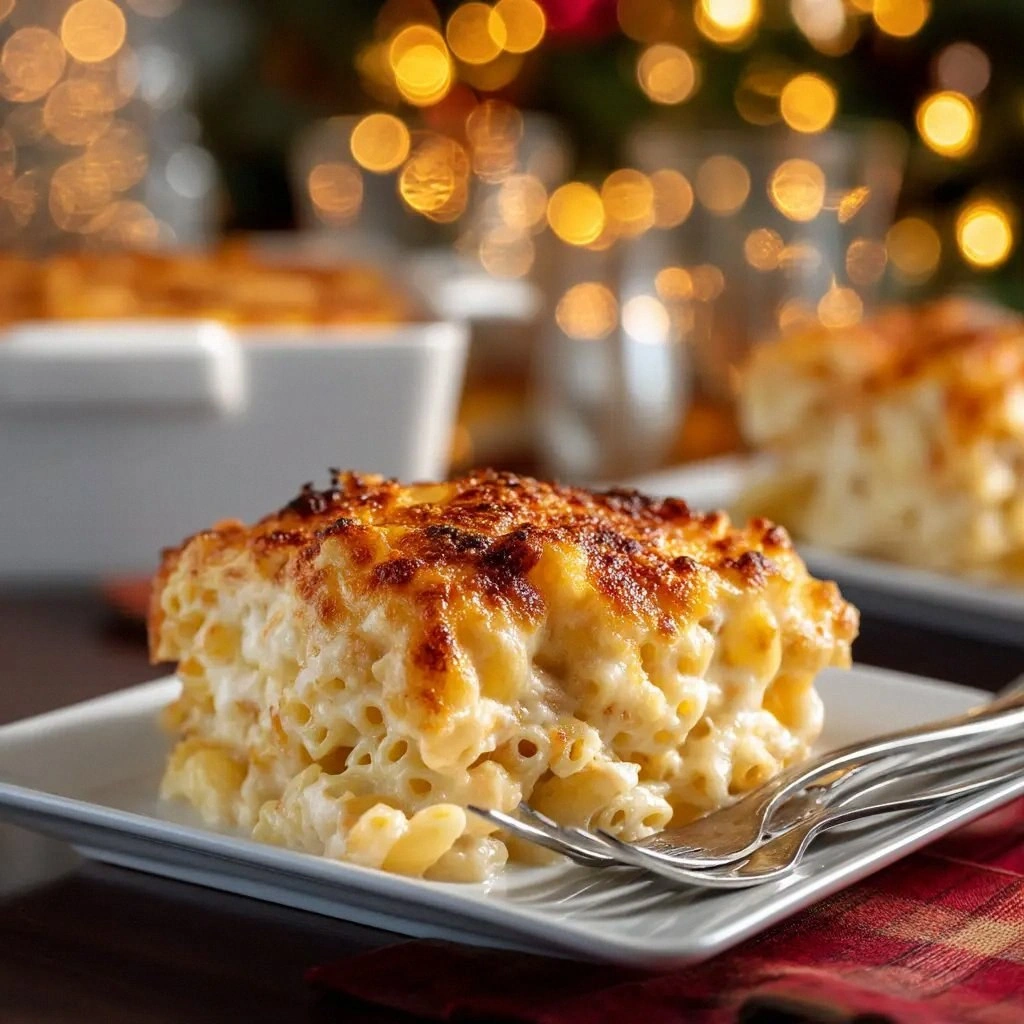
Picture yourself pulling this golden casserole out of the oven, the steam curling like a lazy cloud over the kitchen tiles. The first thing you notice is the irresistible aroma of melted cheddar and a hint of nutmeg that lingers in the air. The sauce is a glossy, velvety blanket that clings to each noodle, while the top is a crisp, buttery crust that crackles when you bite into it. That sizzle when it hits the pan? Absolute perfection. I’ve never seen a dish that could make a simple dinner feel like a celebratory feast.
This version isn’t just another take on a comfort classic; it’s a reimagining that elevates every element. The combination of sharp cheddar and Gruyère creates a complex, umami-rich base that sings in every bite. Adding a touch of paprika and nutmeg gives it depth that’s usually missing from store-bought mixes. And the crunchy breadcrumb topping—infused with Parmesan and butter—provides a textural counterpoint that feels like a final flourish. I’ll be honest—I ate half the batch before anyone else got to try it, and the leftovers have been a staple in my fridge for weeks.
Most recipes get this completely wrong by using only one type of cheese or rushing the sauce. Here, we slow down, coax flavors, and let the ingredients play their parts. I’ve spent hours tweaking ratios, testing different cheeses, and experimenting with baking temperatures until I found the sweet spot that delivers a sauce that coats the pasta like velvet and a crust that shatters like thin ice. If you’ve ever struggled with mac and cheese that turns out dry or lumpy, you’re not alone—and I’ve got the fix.
Okay, ready for the game‑changer? This is hands down the best version you’ll ever make at home. Let me walk you through every single step—by the end, you’ll wonder how you ever made it any other way.
What Makes This Version Stand Out
- Taste: The blend of sharp cheddar and Gruyère delivers a rich, complex flavor profile that balances sharpness with subtle sweetness. The paprika and nutmeg add a warm, aromatic undertone that elevates the overall experience.
- Texture: The sauce is silky and glossy, coating each noodle without clumping, while the breadcrumb topping offers a buttery crunch that contrasts beautifully with the creamy interior.
- Simplicity: Despite the sophisticated flavor, the method is straightforward—no elaborate steps or advanced techniques required. You’ll be able to follow along even if you’re a kitchen newbie.
- Ingredient Quality: Using real cheeses, unsalted butter, and fresh whole milk ensures a depth of flavor that pre‑packaged mixes can’t match.
- Make‑ahead Potential: Assemble the dish, bake it, and then let it cool. It can be refrigerated or frozen and reheated to perfection, making it ideal for busy weeknights.
- Audience Appeal: Whether you’re feeding a crowd, cooking for a family, or treating yourself, this recipe satisfies everyone’s craving for comfort food with a gourmet twist.
Alright, let’s break down exactly what goes into this masterpiece…
Inside the Ingredient List
The Flavor Base
The foundation of this mac and cheese starts with the cheeses. Sharp cheddar provides a bold, tangy bite that cuts through the richness of the milk, while Gruyère adds a nutty, slightly sweet undertone that deepens the flavor. Together, they create a sauce that’s both creamy and full-bodied. If you skip the Gruyère, the dish will still be good, but it will lack that subtle complexity that makes it memorable.
The spices—paprika, black pepper, and nutmeg—are the secret actors that transform a simple cheese sauce into an orchestra of aromas. Paprika brings a gentle smokiness that rounds out the sharpness of the cheddar. Black pepper adds a subtle bite, while nutmeg offers a warm, earthy sweetness that lingers on the palate. If you’re sensitive to spice, you can reduce the paprika to a quarter teaspoon, but the nutmeg is essential for that signature depth.
The Texture Crew
The pasta itself is the canvas. Elbow macaroni is chosen for its shape, which holds the sauce beautifully and provides a satisfying bite. Cooking the pasta al dente before mixing it with the sauce prevents it from becoming mushy once baked. If you prefer a firmer bite, cook the pasta a minute less; if you want a softer texture, let it go a little longer.
The roux—made from butter and flour—acts as the thickening agent that transforms liquid milk into a luscious, velvety sauce. A perfect roux has a light golden color and a nutty aroma, signaling that it’s ready to accept the milk. Skipping the roux will result in a watery sauce that won’t cling to the noodles.
The Unexpected Star
Panko breadcrumbs are the unsung hero that gives the dish its signature crunch. They’re light and airy, creating a crisp, golden crust that contrasts with the creamy interior. The addition of Parmesan and butter to the breadcrumb mixture infuses extra flavor and ensures the topping stays golden without burning. If you’re vegan, you can substitute the butter with olive oil and use a plant‑based Parmesan alternative.
The Final Flourish
The finishing touch is a buttery breadcrumb topping that melts into a golden crust as the dish bakes. The butter in the topping not only adds flavor but also creates a glossy sheen that makes the dish look irresistible. The Parmesan cheese adds a salty, nutty note that balances the richness of the cheese sauce. If you prefer a sweeter crust, you can sprinkle a pinch of brown sugar over the breadcrumbs before baking.
Everything’s prepped? Good. Let’s get into the real action…
The Method — Step by Step
- Bring a large pot of salted water to a rolling boil. Add the elbow macaroni and cook until it’s just shy of al dente, about 8 minutes. Drain the pasta and set it aside, but don’t rinse it—keeping the starch helps the sauce cling. This is the moment of truth: if the pasta is overcooked, it will turn mushy after baking.
- In the same pot, melt ½ cup of unsalted butter over medium heat. Sprinkle in ½ cup of all‑purpose flour, whisking constantly for about 2 minutes until the mixture turns a light golden color. This roux will thicken the milk into a silky sauce. Watch out: if you let the roux burn, it will taste bitter and ruin the flavor.
- Slowly pour in 4 cups of whole milk, whisking continuously to prevent lumps. Keep the mixture on medium heat until it begins to thicken, about 5 minutes. The sauce should be glossy and coat the back of a spoon. At this point, you can taste it—if it’s too thin, give it a minute more.
- Reduce the heat to low and fold in 3 cups of sharp cheddar and 1 cup of Gruyère cheese, stirring until the cheese melts completely and the sauce is smooth. Add 1 tsp of salt, ½ tsp of black pepper, ½ tsp of paprika, and ¼ tsp of nutmeg. The sauce should have a rich, velvety sheen.
- Toss the drained pasta into the cheese sauce, ensuring every noodle is coated. Stir gently to combine, then transfer the mixture into a 9x13 inch baking dish. Spread it evenly so that the top has a chance to crisp up.
- In a small bowl, combine 1 cup of Panko breadcrumbs, ¼ cup of unsalted butter, and ¼ cup of Parmesan cheese. Melt the butter in a skillet or microwave, then stir in the breadcrumbs and Parmesan until everything is evenly coated. Sprinkle this mixture over the top of the pasta.
- Bake in a preheated oven at 375°F (190°C) for 25–30 minutes, or until the top is golden brown and the edges begin to pull away from the sides of the pan. The aroma during this stage is the best part of the whole process—watch the steam rise and the cheese bubble.
- Remove the dish from the oven and let it rest for 5 minutes before serving. This resting period allows the sauce to set and makes it easier to slice. If you’re serving immediately, you’ll have a perfectly golden crust and a silky interior.
That’s it—you did it. But hold on, I’ve got a few more tricks that will take this to another level…
Insider Tricks for Flawless Results
The Temperature Rule Nobody Follows
Many people bake at 400°F, thinking it’ll give a crisper top. I’ve found that 375°F is the sweet spot—it allows the cheese to melt evenly without scorching the breadcrumbs. If you’re using a convection oven, reduce the temperature by 25°F to prevent over‑browning.
Why Your Nose Knows Best
Smell is a powerful cue. When the sauce starts to bubble and the top turns a golden amber, that’s your signal to pull it out. If you wait too long, the crust will burn while the interior remains under‑cooked. Trust your senses over the timer.
The 5‑Minute Rest That Changes Everything
Letting the baked mac sit for five minutes isn’t just a courtesy; it lets the sauce thicken and the flavors meld. This brief rest also makes the dish easier to slice and serves up a more cohesive bite. Skip it and you’ll end up with a runny mess.
The Secret Butter Trick
Instead of melting the butter for the breadcrumb topping, let it sit at room temperature for 30 minutes. When you mix it with the breadcrumbs, it will coat each piece more evenly, ensuring a uniform golden crust that’s less likely to burn.
The “Cheese Swap” Option
If you’re not a cheddar fan, swap the sharp cheddar for a smoked mozzarella or a mix of fontina and provolone. This will give the sauce a different character while still maintaining that creamy, gooey texture. Just be aware that the flavor profile will shift.
Creative Twists and Variations
This recipe is a playground. Here are some of my favorite ways to switch things up:
The Southern Comfort
Add a half cup of buttermilk to the sauce for a tangy kick, and sprinkle chopped bacon bits over the top before baking. The buttermilk will create a subtle tang that pairs wonderfully with the smoky bacon.
The Veggie Boost
Stir in a cup of roasted broccoli or sautéed spinach before baking. The greens add a pop of color and a dose of nutrients, and their mild flavor complements the rich cheese without overpowering it.
The Seafood Surprise
Fold in a cup of cooked shrimp or scallops just before baking. The seafood’s delicate flavor pairs beautifully with the creamy sauce, creating a dish that feels both comforting and upscale.
The Tex‑Mex Twist
Add a tablespoon of taco seasoning to the sauce and top with a handful of corn kernels and chopped cilantro. This version delivers a spicy, savory punch that feels like a fusion of two classic comfort foods.
The Vegan Version
Use a plant‑based cheddar substitute and replace the butter with coconut oil. Swap the whole milk for oat milk and use nutritional yeast for extra flavor. The result is a creamy, dairy‑free mac that still delivers on taste.
The Holiday Edition
Mix in a cup of roasted sweet potato cubes and top with a sprinkle of cinnamon and a drizzle of maple syrup before baking. This version is perfect for a festive gathering and adds a touch of sweetness to the savory base.
Storing and Bringing It Back to Life
Fridge Storage
Cool the baked mac completely before covering it tightly with plastic wrap or an airtight container. It will stay fresh for up to 3 days. When you’re ready to eat, reheat in the oven at 350°F (175°C) for 15 minutes or until warmed through. The breadcrumb crust will remain crisp if you reheat for just the right amount of time.
Freezer Friendly
Wrap the dish in foil and place it in a freezer bag. It will keep for up to 2 months. When reheating, thaw overnight in the fridge, then bake at 350°F (175°C) for 25 minutes. A splash of milk or broth before reheating will help restore the sauce’s silkiness.
Best Reheating Method
The oven is the best choice because it preserves the crispy top and ensures even heating. If you’re short on time, microwave on medium power for 2 minutes, then transfer to the oven for a final 5 minutes to crisp the crust. Adding a tiny splash of water before reheating creates steam that revives the sauce’s moisture.