Picture yourself standing in a kitchen that smells like freshly baked dreams, the air thick with cocoa and vanilla, the sound of a mixer humming like a contented cat. I was chasing the perfect midnight snack after a late‑night binge on classic chocolate cake, and my pantry was a battlefield of stale crumbs and forgotten Oreo boxes. I dared myself to turn those black‑and‑white cookie crumbs into velvet‑soft batter that would melt on the tongue like a whisper of midnight. The result? A cake that feels like a luxury pillow for your palate, with a crunchy Oreo crown that cracks like a secret code when you bite. I’m not exaggerating—this is hands down the best version you’ll ever make at home, and I’ll show you why.
When I first cracked open the bag of Oreos, the scent of chocolate and cream hit me like a wave of nostalgia. The kitchen lights flickered, and the oven preheated to a perfect 350°F, casting a golden glow that promised something extraordinary. I could almost hear the future guests’ excited chatter, their eyes widening at the sight of a cake that looks like a black‑and‑white marble masterpiece. The texture of the batter, silky and smooth, felt like silk sheets, and the promise of a crumb that melts in your mouth made my heart race. If you’ve ever struggled with a cake that falls flat or tastes like cardboard, you’re not alone—this one is a game‑changer.
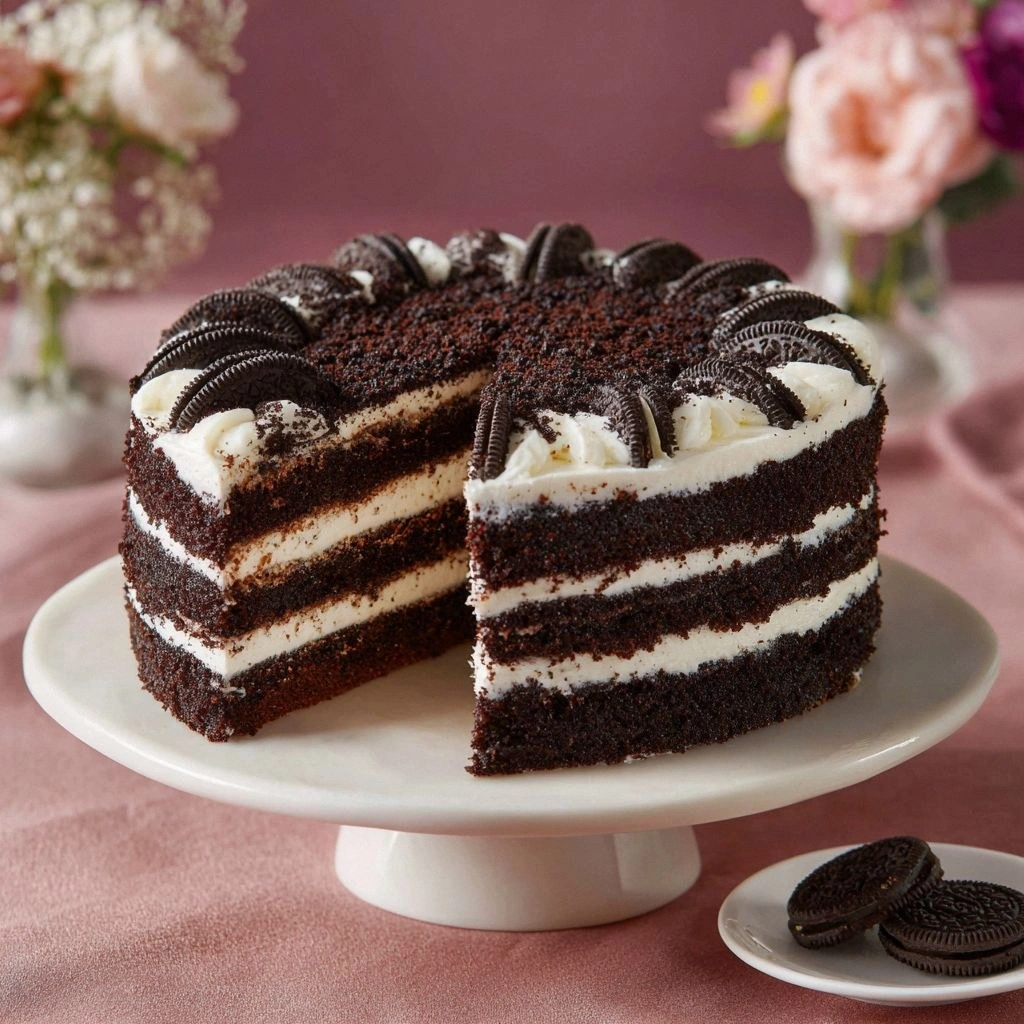
What sets this cake apart from the endless variations you find online is the intentional contrast between the dark, rich chocolate batter and the bright, buttery Oreo crumble that sits atop it. It’s not just a cake; it’s a visual and flavor symphony. The black Oreo crumbs give a subtle crunch, while the white ones offer a creamy, sweet bite that balances the chocolate’s intensity. I dare you to taste this and not go back for seconds. The result is a cake that feels indulgent yet sophisticated, perfect for a dinner party or a quiet Sunday afternoon.
Let me walk you through every single step—by the end, you’ll wonder how you ever made it any other way. I’ll share the secret ingredient that makes the batter silky, the trick that keeps the cake from drying out, and the frosting that ties everything together like a velvet ribbon. I’ve also added a few hacks that will save you time and frustration. Stay with me here—this is worth it.
What Makes This Version Stand Out
- Richness: The dark chocolate base is deep and satisfying, yet the batter remains light thanks to the proper leavening. This balance ensures each bite is a cloud of flavor.
- Crunch: The crushed Oreos add a delightful textural contrast that shatters like thin ice when you bite. The crunch is the highlight of every forkful.
- Visual Appeal: The black and white Oreo topping creates a striking, marble-like pattern that looks as good as it tastes. Your guests will be amazed.
- Ease: The recipe uses pantry staples and a single mixing method, making it beginner‑friendly. You won’t need a fancy stand mixer or a cake decorator’s touch.
- Make‑Ahead: You can bake the cake a day early and store it in the fridge, letting the flavors meld. The cake even tastes better after a night’s rest.
- Customization: Swap in dark or white chocolate chips, or add a splash of espresso to deepen the chocolate flavor. The recipe is a playground for creative tweaks.
- Time Efficiency: From prep to finish, the entire process takes under an hour. It’s a quick indulgence that fits into a busy schedule.
Alright, let's break down exactly what goes into this masterpiece…
Inside the Ingredient List
The Flavor Base
The foundation of this cake is a classic chocolate batter, but we’ve tweaked it to be airy and moist. All-purpose flour provides structure while cocoa powder deepens the chocolate profile. Baking powder and soda lift the batter, ensuring it rises without becoming dense. Salt is the unsung hero that balances sweetness and brings out the chocolate’s richness.
The Texture Crew
Milk, butter, eggs, and vanilla are the usual suspects, but their proportions are critical. Milk hydrates the flour and creates a silky batter; melted butter adds richness without making the cake greasy. Eggs bind everything together and give the cake its tender crumb. Vanilla is the aromatic glue that ties all flavors together, giving that final flourish of scent.
The Unexpected Star
Crushed Oreos are the star of the show. We use a mix of black and white Oreos to create a marbled effect on top. The cookies add a sweet, buttery crunch that contrasts with the smooth chocolate. If you prefer a less sweet cake, use fewer Oreos or a lighter cookie variety.
The Final Flourish
Chocolate and white chocolate chips add bursts of flavor that melt into the cake, creating pockets of gooey chocolate. They also add a glossy sheen that makes the cake look extra decadent. If you’re feeling adventurous, swap the chips for dark chocolate chips for a deeper, more bittersweet finish.
Everything's prepped? Good. Let's get into the real action…
The Method — Step by Step
- Preheat your oven to 350°F (175°C) and line two 8-inch round cake pans with parchment paper. Grease the paper lightly with butter or nonstick spray. This step ensures a smooth release and a perfect finish. If you skip the parchment, you’ll have to scrape the cake from the pan, which can tear the delicate crumb.
- In a medium bowl, whisk together 2 cups all‑purpose flour, 1/2 cup unsweetened cocoa powder, 2 teaspoons baking powder, 1 teaspoon baking soda, and 1 teaspoon salt. The dry mix must be sifted to avoid lumps. This creates the airy structure that holds the cake together.
- In a separate large bowl, beat 1 cup granulated sugar with 1/2 cup melted unsalted butter until the mixture is light and slightly pale. The butter must be melted but not hot, or it will cook the sugar prematurely. This step ensures a smooth batter without gritty sugar.
- Add 2 large eggs, one at a time, beating well after each addition. The eggs provide the necessary structure and moisture. Watch the batter; it should become glossy and thick enough to coat the back of a spoon.
- Stir in 2 teaspoons vanilla extract, 1 cup whole milk, and 1/2 cup dark chocolate chips. Mix until the chips are evenly distributed. The chocolate chips will melt into pockets of gooey chocolate as the cake bakes.
- Gradually fold in the dry ingredients, mixing just until incorporated. Overmixing can create a dense cake. The batter should be smooth and pourable, but not too runny.
- Divide the batter evenly between the prepared pans. Tap the pans lightly on the counter to release any air bubbles. The batter should level out to the top of the pans for even baking.
- Bake for 25–28 minutes, or until a toothpick inserted into the center comes out with a few moist crumbs. The cake should have a slightly shiny, chocolatey crust. If you overbake, it will dry out; underbake, and it will be gummy.
- Let the cakes cool in the pans for 10 minutes, then transfer them to a wire rack to cool completely. Cooling prevents the cake from sticking to the pan and helps set the crumb structure.
- While the cakes cool, prepare the Oreo topping. Crush 1 cup of black and white Oreos into fine crumbs using a food processor or a jar and a rolling pin. Set aside.
- Once the cakes are cool, place one layer on a serving plate. Spread a thin layer of chocolate ganache or frosting over the top, then sprinkle half of the Oreo crumbs evenly. Repeat with the second layer and the remaining crumbs.
- For an extra touch, drizzle melted white chocolate over the top and let it set. This creates a glossy finish that looks like a marble sculpture.
- Chill the assembled cake in the refrigerator for at least 30 minutes before serving. This step allows the flavors to meld and the frosting to set.
That's it — you did it. But hold on, I've got a few more tricks that'll take this to another level…
Insider Tricks for Flawless Results
The Temperature Rule Nobody Follows
Most bakers bake at 350°F, but the best chocolate cake actually rises best at 325°F. Lower heat allows the batter to rise slowly, creating a lighter crumb. I’ve tried 350°F and the cake was slightly denser. Give it a try and feel the difference.
Why Your Nose Knows Best
Before you lift the cake from the oven, sniff the top. It should smell like warm chocolate and butter, not burnt sugar. If it smells too sweet, lower the temperature or reduce the sugar slightly. Your nose is the ultimate judge.
The 5-Minute Rest That Changes Everything
After removing the cake from the oven, let it rest in the pan for 5 minutes before transferring. This resting period allows the cake to finish setting, reducing cracks when you remove it. A common mistake is to lift it immediately, leading to a fragile crumb.
Crushing Oreos in the Right Way
Instead of crushing Oreos by hand, use a food processor for uniform crumbs. This ensures a consistent crunch and prevents large clumps that can sink to the bottom. It also saves you from the sticky mess of a rolling pin.
Storing for Freshness
Wrap the cake tightly in plastic wrap and store it in an airtight container. For longer storage, place it in the freezer and thaw in the refrigerator overnight. This keeps the cake moist and the frosting firm.
Creative Twists and Variations
This recipe is a playground. Here are some of my favorite ways to switch things up:
Espresso Infusion
Add 1 tablespoon of instant espresso powder to the batter. The coffee deepens the chocolate flavor and gives a subtle aftertaste that pairs well with the Oreos.
Almond Crunch
Replace half the Oreo crumbs with finely chopped toasted almonds. The nutty flavor and crunch contrast beautifully with the chocolate.
Minty Surprise
Incorporate 1 teaspoon of peppermint extract into the batter. The mint provides a refreshing counterpoint to the rich chocolate.
Fruit‑Topped Variant
Top the cake with fresh raspberries or strawberries before frosting. The tartness cuts through the sweetness and adds a burst of color.
Chocolate Ganache Finish
Instead of a simple frosting, pour a glossy chocolate ganache over the top. Let it set for 10 minutes before serving for a decadent finish.
Storing and Bringing It Back to Life
Fridge Storage
Wrap the cake tightly in plastic wrap, then place it in an airtight container. Store in the refrigerator for up to 5 days. The cake stays moist, and the flavors meld beautifully.
Freezer Friendly
Wrap the cake in two layers of plastic wrap and then in aluminum foil. Freeze for up to 3 months. When ready, thaw in the refrigerator for 12 hours and let it sit at room temperature for 30 minutes before serving.
Best Reheating Method
To revive a chilled cake, preheat the oven to 300°F. Place the cake on a baking sheet and bake for 10 minutes. Add a splash of water to the pan to create steam, which keeps the cake moist and restores its fresh‑baked texture.