I was staring at a half‑cooked chicken in a skillet that had turned into a greasy, sad mess. The oil had splattered everywhere, the seasoning had been too bland, and the crust was a sad, soggy brown. That night, after a disastrous dinner party, I swore I would never again settle for mediocre fried chicken again. I dared myself to find the perfect balance of crisp, juicy, and flavorful.
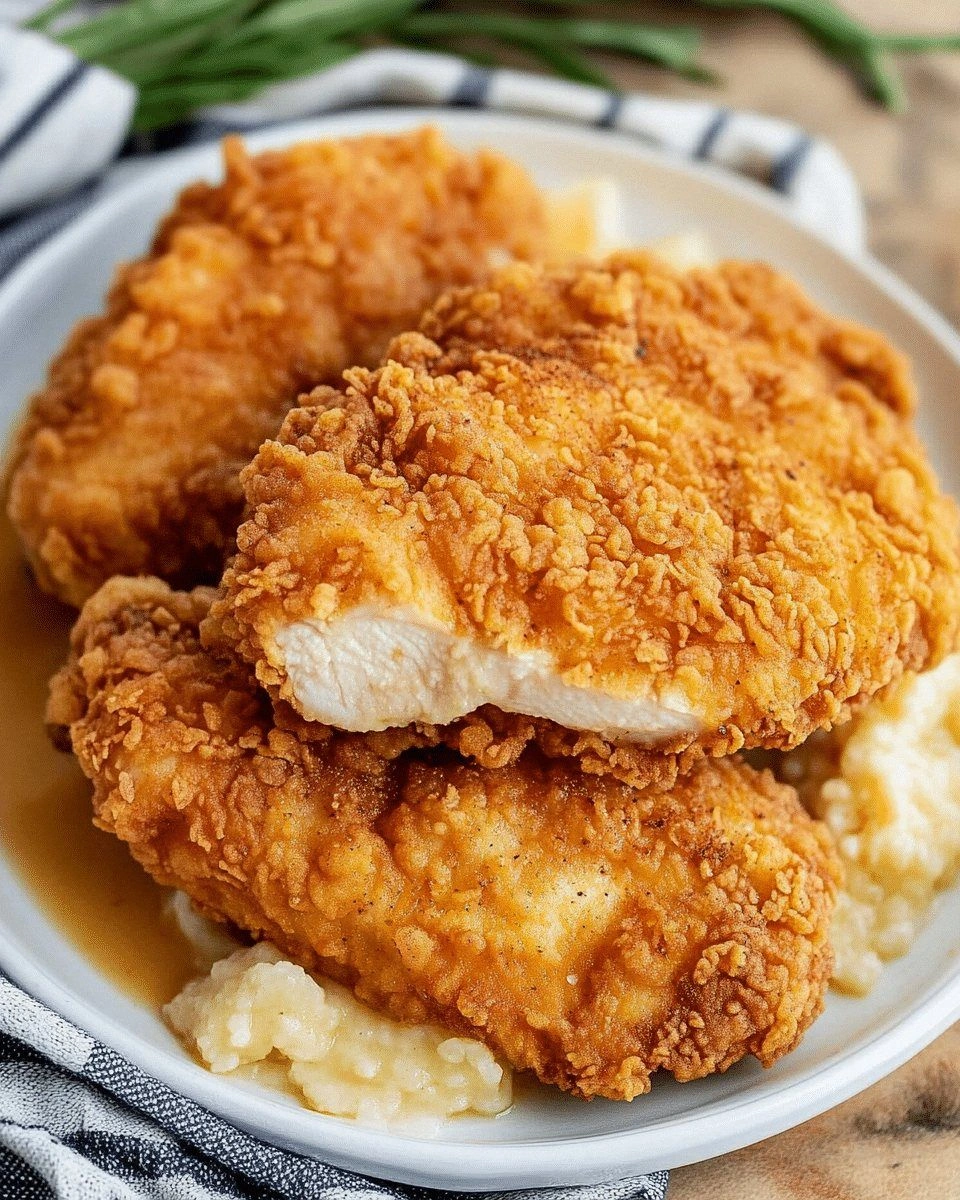
Picture this: a golden crust that cracks like brittle ice, a savory aroma that lingers long after you’ve taken the last bite, and a juicy interior that practically melts in your mouth. I can almost hear the sizzle that starts as a low hiss and escalates into a satisfying pop as the chicken hits the hot oil. The first bite is a burst of crunch, followed by a smoky, slightly spicy depth that makes your taste buds do a happy dance. If you’ve ever had a chicken that was either dry or greasy, this is the antidote you’ve been craving.
What sets this version apart isn’t just the crispness—it’s the subtle layering of flavors that come from a simple yet effective marination and a dual‑flour coating. I’ve tweaked the ratio of flour to cornmeal, added a splash of buttermilk for tenderness, and sprinkled a dash of cayenne for that faint heat that lingers without overwhelming. The result? A dish that feels like a hug from the inside out.
I’ll walk you through every single step, from the first whisk to the final garnish. By the end, you’ll wonder how you ever made it any other way. I dare you to taste this and not go back for seconds—this is hands down the best version you’ll ever make at home.
What Makes This Version Stand Out
- Flavor: The blend of paprika, garlic, and cayenne creates a subtle heat that pairs perfectly with the buttery crust. It’s a flavor profile that’s both familiar and exciting.
- Crispness: Using a cornmeal‑flour mix gives the crust a crunchy exterior while keeping the inside moist. The double coating technique seals in juices.
- Simplicity: All the ingredients you need are pantry staples—no exotic spices or hard‑to‑find items. This recipe is a quick fix for busy weeknights.
- Uniqueness: The buttermilk soak not only tenderizes but also adds a subtle tang that elevates the overall flavor.
- Crowd‑Pleaser: Friends and family can’t stop asking for seconds, and I’ve been known to eat half the batch before anyone else gets a bite.
- Ingredient Quality: Using fresh, high‑quality chicken and real butter for finishing makes a noticeable difference in taste.
- Make‑Ahead Potential: Marinate the chicken a few hours or even overnight, and it’s ready to cook when you are.
Alright, let's break down exactly what goes into this masterpiece...
Inside the Ingredient List
The Flavor Base
The foundation of this dish is the spice blend that coats the chicken before it hits the oil. Paprika, garlic powder, and onion powder provide a savory backbone, while a pinch of cayenne pepper introduces a whisper of heat that lingers on the tongue. If you’re sensitive to spice, reduce the cayenne to a quarter teaspoon and you’ll still get that subtle kick.
The Texture Crew
Flour and cornmeal are the stars of the show. Flour offers a smooth, even coating that crisps beautifully, whereas cornmeal adds a hearty crunch. Together, they create a dual‑texture that’s impossible to resist. If you’re gluten‑free, swap the flour for a gluten‑free blend and keep the cornmeal for that essential crunch.
The Unexpected Star
Buttermilk isn’t just a tenderizer—it also adds a subtle tang that brightens the overall flavor profile. The acidity breaks down the proteins in the chicken, making the meat incredibly juicy. If you can’t find buttermilk, a mix of milk and white vinegar works just as well.
The Final Flourish
A splash of melted butter brushed over the finished chicken gives it a glossy shine and a buttery finish that ties everything together. Fresh thyme or rosemary added during the last minute of cooking adds a fragrant herbal note that elevates the dish from simple to unforgettable. If you’re vegan or lactose intolerant, a drizzle of olive oil will suffice.
Everything's prepped? Good. Let's get into the real action...
The Method — Step by Step
- Begin by rinsing the chicken pieces under cold water and patting them dry with paper towels. Patting them dry is essential; excess moisture will cause the coating to fall off during frying. Set the pieces aside while you prepare the marination.
- In a large bowl, whisk together the buttermilk, salt, pepper, paprika, garlic powder, onion powder, and cayenne. The mixture should be thick enough to coat the chicken evenly. This step is where the magic begins—think of it as the flavor foundation.
- Add the chicken pieces to the buttermilk mixture, ensuring each piece is fully submerged. Cover the bowl and refrigerate for at least 30 minutes, or up to 4 hours for maximum tenderness. The longer you marinate, the more tender and flavorful the chicken will be.
- In a separate shallow dish, combine the flour, cornmeal, and a pinch of salt. Stir until the mixture is evenly blended. This dry coating will form the crispy outer layer.
- Remove each chicken piece from the buttermilk, allowing excess liquid to drip off, then dredge it in the flour‑cornmeal mixture. Press the coating onto the surface to ensure it adheres well. Shake off any excess before placing the chicken in a second shallow dish.
- Heat vegetable oil in a deep skillet or Dutch oven to 350°F (175°C). The oil should be deep enough to submerge at least half of the chicken. Use a thermometer for precision; this ensures even cooking.
- Carefully place the coated pieces in the hot oil, working in batches if necessary. Fry for 8–10 minutes per side, or until the internal temperature reaches 165°F (74°C) and the crust is golden brown. Flip only once to maintain crispness.
- Transfer the fried chicken to a wire rack set over a baking sheet to drain excess oil. Let it rest for 5 minutes; this allows the juices to redistribute and keeps the meat moist.
- Finish by brushing the hot chicken with melted butter and a sprinkle of fresh thyme or rosemary. This final touch adds a glossy sheen and a fragrant finish.
- Serve immediately with your favorite sides—mashed potatoes, coleslaw, or a simple green salad. The contrast of textures and flavors will leave everyone asking for seconds.
That’s it— you did it. But hold on, I’ve got a few more tricks that’ll take this to another level. I dare you to try these next time and feel the difference.
Insider Tricks for Flawless Results
The Temperature Rule Nobody Follows
Oil temperature is the secret weapon for the perfect crust. Too hot, and the coating burns before the chicken cooks through; too cool, and it absorbs too much oil. Aim for 350°F (175°C) and keep a thermometer handy. This small step eliminates soggy, greasy chicken and ensures a uniform golden finish.
Why Your Nose Knows Best
Before you even flip the chicken, listen for that faint “pop” that signals the crust has set. If you hear a subtle sizzle, it’s ready to turn. Trusting your senses, especially the aroma, will save you from over‑cooking or under‑cooking.
The 5‑Minute Rest That Changes Everything
Letting the chicken rest on a wire rack for 5 minutes is more than just a courtesy; it lets the juices redistribute, preventing the meat from drying out. A quick rest also allows the crust to firm up, giving it that satisfying crunch when you bite in.
The Double‑Coat Delight
If you’re craving an extra crispy exterior, double‑coat the chicken. After the first coating, dip it back into the buttermilk, then coat again. This technique creates a thicker crust that holds up even after reheating.
The Butter Finish
Brushing melted butter over the hot chicken adds shine and a buttery flavor that complements the spices. It also helps keep the crust crisp. Skip the butter? Try a light drizzle of olive oil for a different finish.
Creative Twists and Variations
This recipe is a playground. Here are some of my favorite ways to switch things up:
Spicy Cajun Kick
Swap the paprika and cayenne with a Cajun seasoning blend. The result is a bold, smoky flavor that pairs wonderfully with a cool yogurt dip.
Herb‑Infused Delight
Add chopped fresh rosemary or thyme to the flour mixture. The herbs infuse the crust with aromatic notes that elevate the dish for a more refined palate.
Corn‑Based Crunch
Replace half the flour with cornmeal for a heartier crunch. The cornmeal also adds a subtle sweetness that balances the savory spices.
Buttermilk Marinade Swap
Use a mixture of milk and lemon juice instead of buttermilk for a tangy twist. This variation is great when you’re out of buttermilk but still want that tenderizing effect.
Vegan Version
Swap chicken for tofu or plant‑based nuggets and use a plant‑based milk in the marination. The coating process stays the same, delivering a crispy, flavorful vegan option.
Sweet and Smoky
Add a tablespoon of brown sugar to the flour mix and sprinkle smoked paprika on top before frying. The sweetness caramelizes, creating a caramelized crust that’s irresistible.
Storing and Bringing It Back to Life
Fridge Storage
Store cooked chicken in an airtight container for up to 4 days. Keep the chicken on a rack to prevent sogginess. When ready to serve, reheat in a preheated oven at 375°F (190°C) for 10 minutes.
Freezer Friendly
Freeze individually wrapped chicken pieces for up to 3 months. Thaw overnight in the fridge and reheat in the oven at 375°F (190°C) for 15 minutes. The crust will remain crisp if you use a wire rack during reheating.
Best Reheating Method
The best way to revive the crunch is to reheat in a skillet over medium heat for 2–3 minutes on each side. Add a splash of water before covering to create steam, then lift the lid to let the steam escape and the crust crisp up.