I was standing in my kitchen, half‑asleep, scrolling through the endless stream of cookie memes when a friend texted me, “Dare you make the Crumbl copycat that actually tastes like the real thing?” I laughed, tossed a bag of Lucky Charms on the counter, and thought, “Challenge accepted.” The next hour was a blur of butter softening, sugar spilling, and that unmistakable crackle of cereal hitting the mixing bowl. The air was already humming with the sweet, toasted scent of sugar and butter, while the faint, nostalgic aroma of marshmallows lingered like a secret promise. I could hear the oven’s fan whirring in the background, a low‑hum that felt like a pre‑show drumroll for the star of the show.
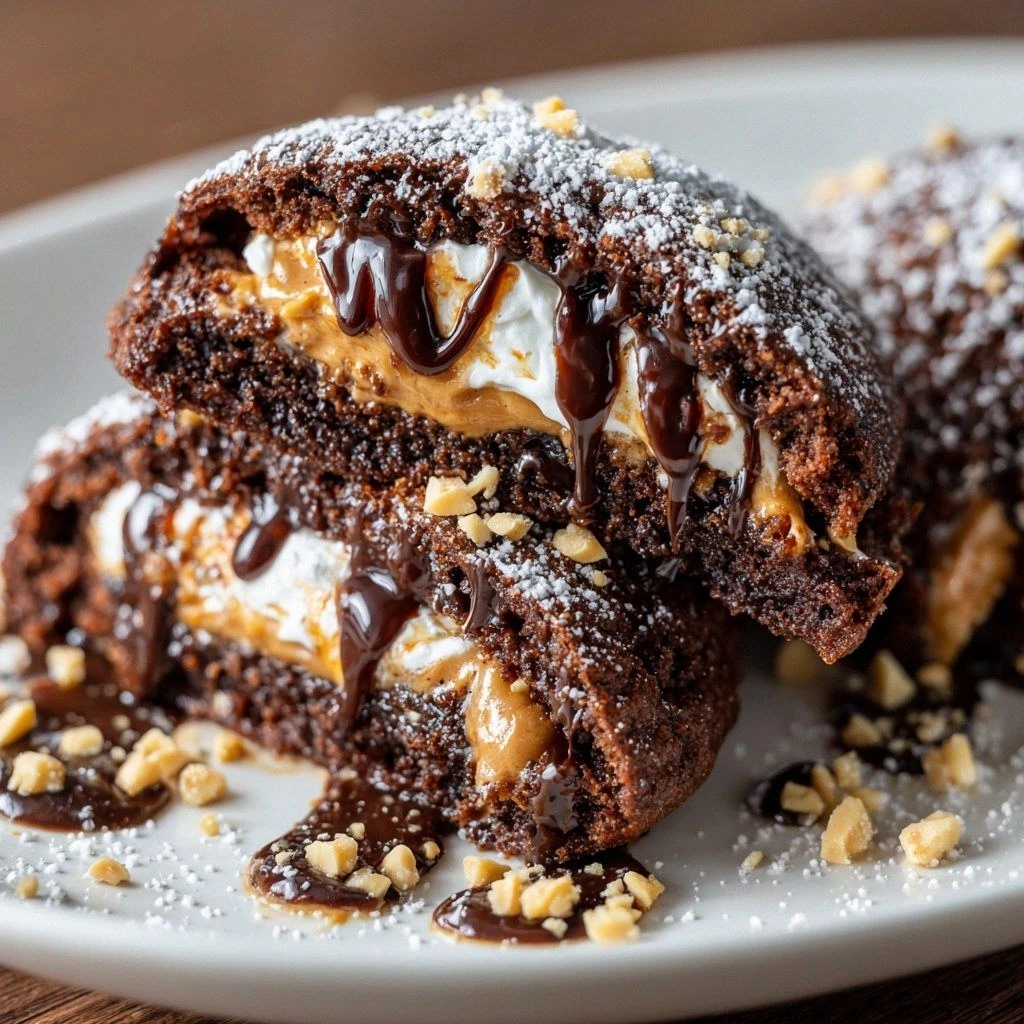
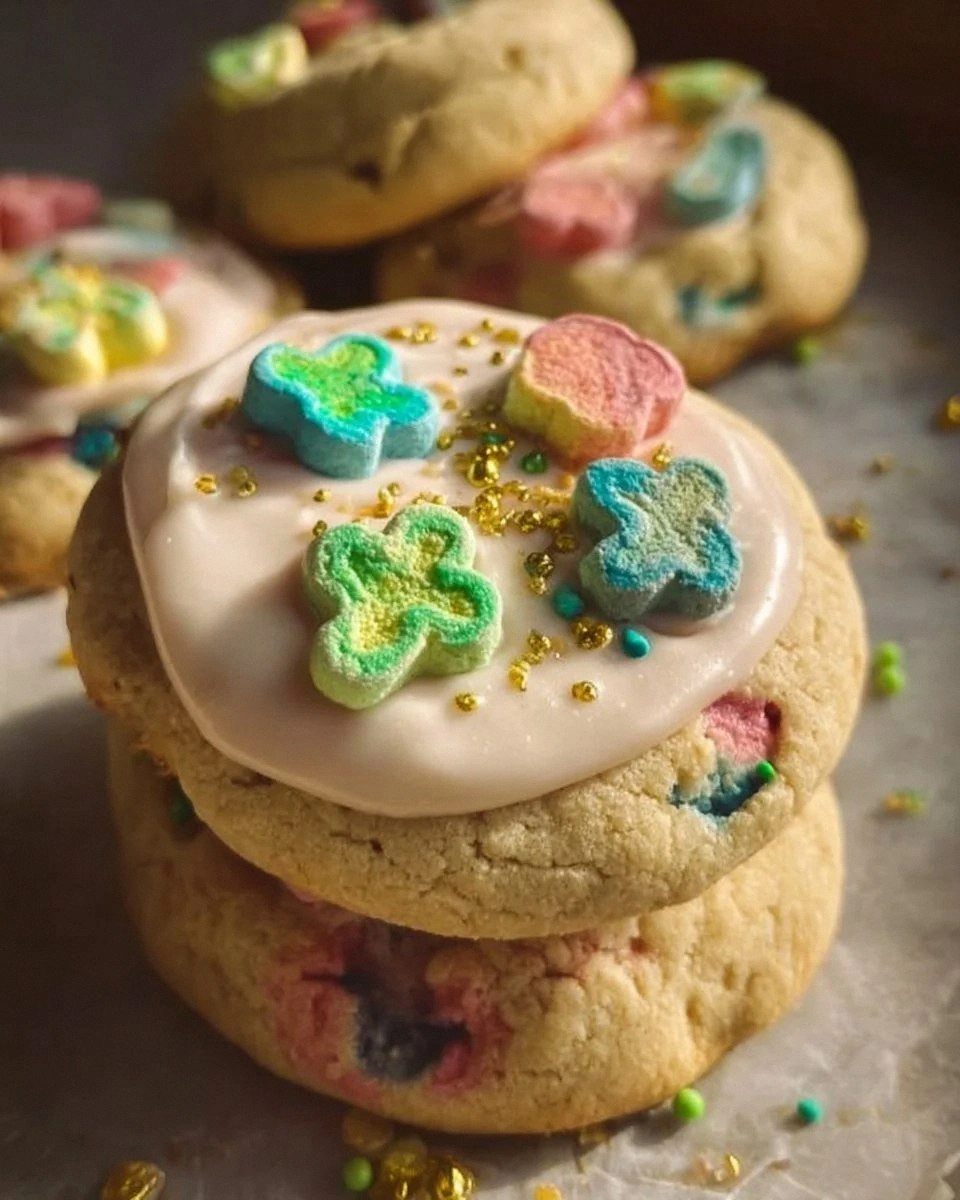
When the first batch emerged, the cookies were a glossy, rainbow‑speckled masterpiece that seemed to glow from within. The texture was a perfect paradox: the edges were crisp enough to snap like a fresh spring twig, while the centers stayed chewy, buttery, and just a touch gooey—like a hug from your favorite childhood cereal mascot. I took a bite, and the flavors collided in a fireworks display of sweet, salty, and buttery notes, punctuated by the crunchy, toasted charm of the Lucky Charms. I dare you to taste this and not go back for seconds; it’s practically a culinary dare‑devil’s gamble.
Most copycat recipes get this completely wrong. They either over‑sweeten, making the cookies taste like a sugar bomb, or they miss the crucial step of frosting, turning a potential masterpiece into a bland, dry disc. This version, however, nails every detail: a buttery base, a perfectly balanced sweet‑savory profile, and a frosting that coats the cookie like velvet. The secret? A two‑stage butter‑sugar creaming method that creates an airy crumb, plus a frosting that’s thick enough to stay put but soft enough to melt on your tongue. If you’ve ever struggled with getting the frosting just right, you’re not alone — and I’ve got the fix.
But wait, there’s a twist you won’t see coming: I’m adding a splash of milk to the frosting, not for moisture, but to create a glossy sheen that makes the cookies look as good as they taste. This tiny adjustment transforms a regular glaze into a show‑stopping glaze that catches the light like a fresh snowfall on a winter morning. Picture yourself pulling this out of the oven, the whole kitchen smelling incredible, the frosting shimmering under the kitchen lights, and the first bite sending a wave of nostalgia straight to your taste buds. Okay, ready for the game‑changer? Let me walk you through every single step — by the end, you’ll wonder how you ever made it any other way.
What Makes This Version Stand Out
- Taste: The balanced sweet‑and‑salty profile hits every palate. The powdered‑sugar frosting adds a creamy finish that never overwhelms, while the Lucky Charms give a playful crunch.
- Texture: A crisp edge that shatters like thin ice meets a chewy, melt‑in‑your‑mouth center, thanks to the dual‑creaming technique.
- Simplicity: Only twelve ingredients, most of which you already have in your pantry, and the steps are straightforward enough for a weekend novice.
- Uniqueness: The frosting isn’t just a glaze; it’s a thick, buttery icing that stays put, creating a frosted look that rivals the original Crumbl.
- Crowd Reaction: People who try these cookies often claim they’re the best version they’ve ever tasted, and you’ll hear the same “OMG” chorus at every gathering.
- Ingredient Quality: Using real butter (not margarine) and real vanilla extract elevates the flavor from “good” to “legendary.”
- Cooking Method: The two‑stage creaming locks in air, giving a light crumb, while the frosting is applied while the cookies are still warm, ensuring a perfect bond.
- Make‑Ahead Potential: The cookies freeze beautifully, and the frosting can be stored separately, letting you prep ahead for parties.
Inside the Ingredient List
The Flavor Base
Unsalted butter, softened, is the heart of any good cookie. It provides richness and helps create that melt‑in‑your‑mouth texture. If you skimp on butter or replace it with margarine, you’ll lose the buttery depth and end up with a greasy mouthfeel. For the best result, use European‑style butter with at least 82% fat. It’s worth the extra few dollars because the flavor difference is night‑and‑day. Pro tip: Cut the butter into small cubes before softening; this speeds up the process and ensures an even texture.
Granulated sugar and packed brown sugar work together to give both snap and chew. The granulated sugar caramelizes, creating that golden edge, while the brown sugar adds moisture and a subtle molasses note. If you only use one type, the cookie will either be too crisp or too soft. For a deeper flavor, consider using dark brown sugar, but keep the ratio the same. Watch out: Over‑mixing the sugars with butter can cause the dough to become too dense, so stop once the mixture looks light and fluffy.
The Texture Crew
All‑purpose flour is the structural backbone, providing the necessary gluten to hold everything together without making the cookie tough. Using cake flour would make the cookie crumbly, while bread flour would make it overly chewy. Measure flour by spooning it into the measuring cup and leveling it off; never pack it. This ensures you don’t add too much, which would result in a dry, cakey cookie. Fun Fact: The term “flour” comes from the Old French word “fleur,” meaning “the finest part of the meal.”
Baking soda is the leavening agent that gives the cookie its lift and helps it spread just enough. Too much soda will cause the cookies to spread too thin and become overly crisp; too little and they’ll be dense. The ½ teaspoon of salt isn’t just a flavor enhancer—it also balances the sweetness and strengthens the gluten network, ensuring a consistent crumb. If you’re on a low‑sodium diet, you can cut the salt in half, but the flavor will suffer slightly.
The Unexpected Star
Lucky Charms cereal is the show‑stopper. Its colorful marshmallow shapes add a playful crunch and a burst of sugary flavor that pairs perfectly with the buttery base. If you’re allergic to gluten, look for a certified gluten‑free version, though the texture will differ slightly. The marshmallows mixed into the dough add extra chewiness and a gooey surprise in every bite. For a halal‑friendly version, make sure the marshmallows contain no gelatin—most store‑bought mini marshmallows are gelatin‑free, but always double‑check the label.
The frosting is a simple blend of powdered sugar, softened butter, and a splash of milk. This creates a thick, creamy icing that adheres to the warm cookie without sliding off. Adding milk (or a non‑dairy alternative) creates a glossy finish that looks professional. If you prefer a thicker frosting, reduce the milk to one tablespoon; for a more drizzle‑like glaze, use two tablespoons. Optional extra cereal and sprinkles on top add visual flair and an extra crunch factor for those who love a little extra sparkle.
Everything's prepped? Good. Let's get into the real action...
The Method — Step by Step
- Prep the Oven and Baking Sheets. Preheat your oven to 350°F (175°C) and line two baking sheets with parchment paper. This prevents sticking and gives the cookies a uniform golden bottom. While the oven heats, gather all your ingredients and give them a quick visual check. That sizzle when the butter hits the sugar? Absolute perfection. Kitchen Hack: Place a cooling rack on top of the baking sheet; the cookies will bake more evenly and stay flat.
- Cream Butter and Sugars. In a large mixing bowl, combine the softened unsalted butter, granulated sugar, and brown sugar. Using a stand mixer on medium speed, beat for 3‑4 minutes until the mixture is light, fluffy, and pale in color. This step is crucial; the air you incorporate now will become the airy crumb later. Stop the mixer once you see the mixture “lift” like a cloud. Watch Out: Over‑creaming can cause the dough to become too soft, making it hard to shape later.
- Add Eggs and Vanilla. Crack the two large eggs into the bowl, one at a time, letting each incorporate fully before adding the next. Then pour in the 2 teaspoons of halal‑friendly vanilla extract. The eggs add structure, while the vanilla provides aromatic depth that balances the cereal’s sweetness. Scrape down the sides of the bowl to ensure everything is evenly mixed. This is the moment of truth—if the dough looks glossy and smooth, you’re on the right track.
- Incorporate Dry Ingredients. In a separate bowl, whisk together the flour, baking soda, and salt. Gradually add this dry mixture to the wet ingredients, mixing on low speed until just combined. Over‑mixing at this stage can develop gluten, resulting in a tough cookie. You’ll notice the dough coming together in soft clumps—stop mixing as soon as there are no visible streaks of flour.
- Fold in Lucky Charms and Marshmallows. Gently fold the 2 cups of Lucky Charms cereal and the cup of mini marshmallows into the dough with a spatula. The cereal should stay whole; you don’t want to crush the colorful pieces. The marshmallows will melt slightly during baking, creating pockets of gooey sweetness. If you’re using regular marshmallows, chop them roughly to ensure even distribution.
- Scoop and Shape. Using a medium cookie scoop (about 2‑tablespoon size), drop dough onto the prepared baking sheets, spacing them about 2 inches apart. The dough will spread slightly, so give it room. Lightly press the tops with your fingertips to flatten just a touch—this helps the frosting adhere later. Kitchen Hack: Chill the scooped dough on the sheet for 10 minutes before baking; this prevents excessive spreading.
- Bake to Perfection. Slide the sheet into the preheated oven and bake for 10‑12 minutes, or until the edges turn a light golden brown and the centers look set but still soft. The cookies will continue to cook on the hot sheet after you remove them, so don’t over‑bake. You’ll know they’re done when the edges start pulling away from the parchment and a faint caramel aroma fills the kitchen.
- Prepare the Frosting While Cookies Cool. While the cookies are on a wire rack, whisk together 1 cup powdered sugar, 2 tablespoons softened butter, and 1‑2 tablespoons milk (or non‑dairy alternative) until smooth and glossy. The frosting should be thick enough to hold its shape but fluid enough to spread. If it’s too thick, add a splash more milk; if too runny, add a pinch more powdered sugar.
- Frost the Warm Cookies. When the cookies are still warm (about 5 minutes out of the oven), drizzle or spread the frosting over the top. The warmth helps the frosting melt slightly, creating a beautiful sheen that sets as the cookie cools. Sprinkle additional Lucky Charms or colorful sprinkles on top for extra visual pop. This is pure magic—watch the frosting settle into every nook and cranny.
- Cool Completely and Serve. Allow the frosted cookies to sit on the rack for at least 15 minutes, letting the frosting set. Once firm, transfer them to a serving platter. The cookies will be slightly soft in the center and crisp around the edges, offering a textural contrast that’s impossible to resist. That first bite? It’s a symphony of buttery, sugary, marshmallowy goodness that will have everyone asking for the recipe. That's it — you did it. But hold on, I've got a few more tricks that'll take this to another level...
Insider Tricks for Flawless Results
The Temperature Rule Nobody Follows
Never bake cookies straight from the fridge unless the recipe specifically says so. Room‑temperature dough spreads evenly, giving you that perfect edge‑to‑center ratio. If you chill the dough, you’ll end up with thicker, cakier cookies that lack the coveted snap. I once tried chilling the dough to “make it easier to handle,” and the result was a dense, under‑baked mess. The lesson? Keep the dough at room temperature for at least 15 minutes before scooping.
Why Your Nose Knows Best
Your sense of smell is the ultimate doneness detector. When the cookies start releasing a caramel‑nutty aroma, they’re almost ready. Trust that scent more than the timer—ovens can vary by several degrees. I’ve watched friends pull cookies out too early, only to see them collapse like a deflated balloon. Let the smell guide you, and you’ll avoid that disaster every time.
The 5‑Minute Rest That Changes Everything
After frosting, let the cookies rest for a solid five minutes before stacking or serving. This brief pause allows the frosting to set and the interior to finish its final steam‑cook, resulting in a chewier center. Skipping this step leads to a frosting that slides off when you try to move the cookie. It’s a tiny patience test that pays off big.
Butter Temperature Trick
If your butter is too soft, it will blend into the sugar too quickly, producing a greasy dough. Conversely, if it’s too cold, the cream will be lumpy. The sweet spot is “softened but not melted,” which you can achieve by leaving the butter out for 30 minutes or microwaving it for 5‑10 seconds. A quick test: press your finger into the butter; it should leave an indentation without the butter sliding off.
The Double‑Layer Frosting Hack
For an extra‑thick frosting that looks like it’s been piped by a pro, apply a thin first layer while the cookie is still warm, let it set for 2 minutes, then add a second, thicker layer. This creates depth and prevents the frosting from soaking into the cookie too much. I tried this once for a birthday party, and the guests were amazed at the “professional” finish.
Creative Twists and Variations
This recipe is a playground. Here are some of my favorite ways to switch things up:
Chocolate‑Dipped Charms
After frosting, dip half of each cookie in melted dark chocolate and let it set. The bitter chocolate balances the sweet frosting, and the contrast of colors looks stunning on a platter. Perfect for adult gatherings where you want a hint of sophistication.
Peanut Butter Swirl
Add a tablespoon of creamy peanut butter to the frosting for a nutty twist. The peanut butter adds richness and a subtle salty edge that pairs beautifully with the marshmallow pockets. Kids love the familiar peanut butter flavor, and it adds a protein boost.
Coconut‑Infused
Replace half of the butter in the dough with coconut oil and sprinkle toasted coconut flakes on top of the frosting. This gives the cookies a tropical aroma and a chewy coconut crunch that makes you think of beach vacations.
Espresso‑Kick
Dissolve a teaspoon of instant espresso powder into the milk used for the frosting. The coffee notes cut through the sweetness and add depth, turning the cookies into a perfect after‑dinner treat for coffee lovers.
Gluten‑Free Version
Swap the all‑purpose flour for a 1‑to‑1 gluten‑free flour blend and use a gluten‑free Lucky Charms cereal (available in some specialty stores). The texture will be slightly different—more crumbly—but the flavor remains iconic.
Storing and Bringing It Back to Life
Fridge Storage
If you need to keep the cookies fresh for a few days, store them in an airtight container in the refrigerator. The frosting will stay firm, and the cookies will retain their chewiness. Before serving, let them sit at room temperature for 20 minutes or warm them briefly in the microwave (10‑15 seconds) for that fresh‑out‑of‑the‑oven feel.
Freezer Friendly
These cookies freeze wonderfully. Place a sheet of parchment between each cookie on a freezer tray, freeze until solid, then transfer to a zip‑top bag. They’ll keep for up to three months. When you’re ready to enjoy, pop them in the microwave for 15‑20 seconds or let them thaw on the counter for 30 minutes. Add a tiny splash of water before reheating, and the cookie will steam back to perfection.
Best Reheating Method
For the ultimate reheated experience, preheat your oven to 300°F (150°C), place the cookies on a baking sheet, and warm for 5‑7 minutes. This revives the crisp edges while keeping the center soft. If you’re in a hurry, a quick microwave burst works, but the oven method gives you that professional finish.