Picture this: I’m standing in a kitchen that looks more like a disaster zone than a culinary studio. I had just pulled a batch of pancakes, and the batter had gone soggy and flat, leaving me staring at a stack of pancake‑sized pancakes that looked like a toddler’s art project. I was ready to give up, but a friend dared me to try a different breakfast hack—something that would make the whole kitchen smell like autumn and leave me craving a second bite. I was skeptical, but I decided to give it a shot, and that’s when the idea of oven‑roasted oat apple snacks hit me like a gust of fresh, crisp air.
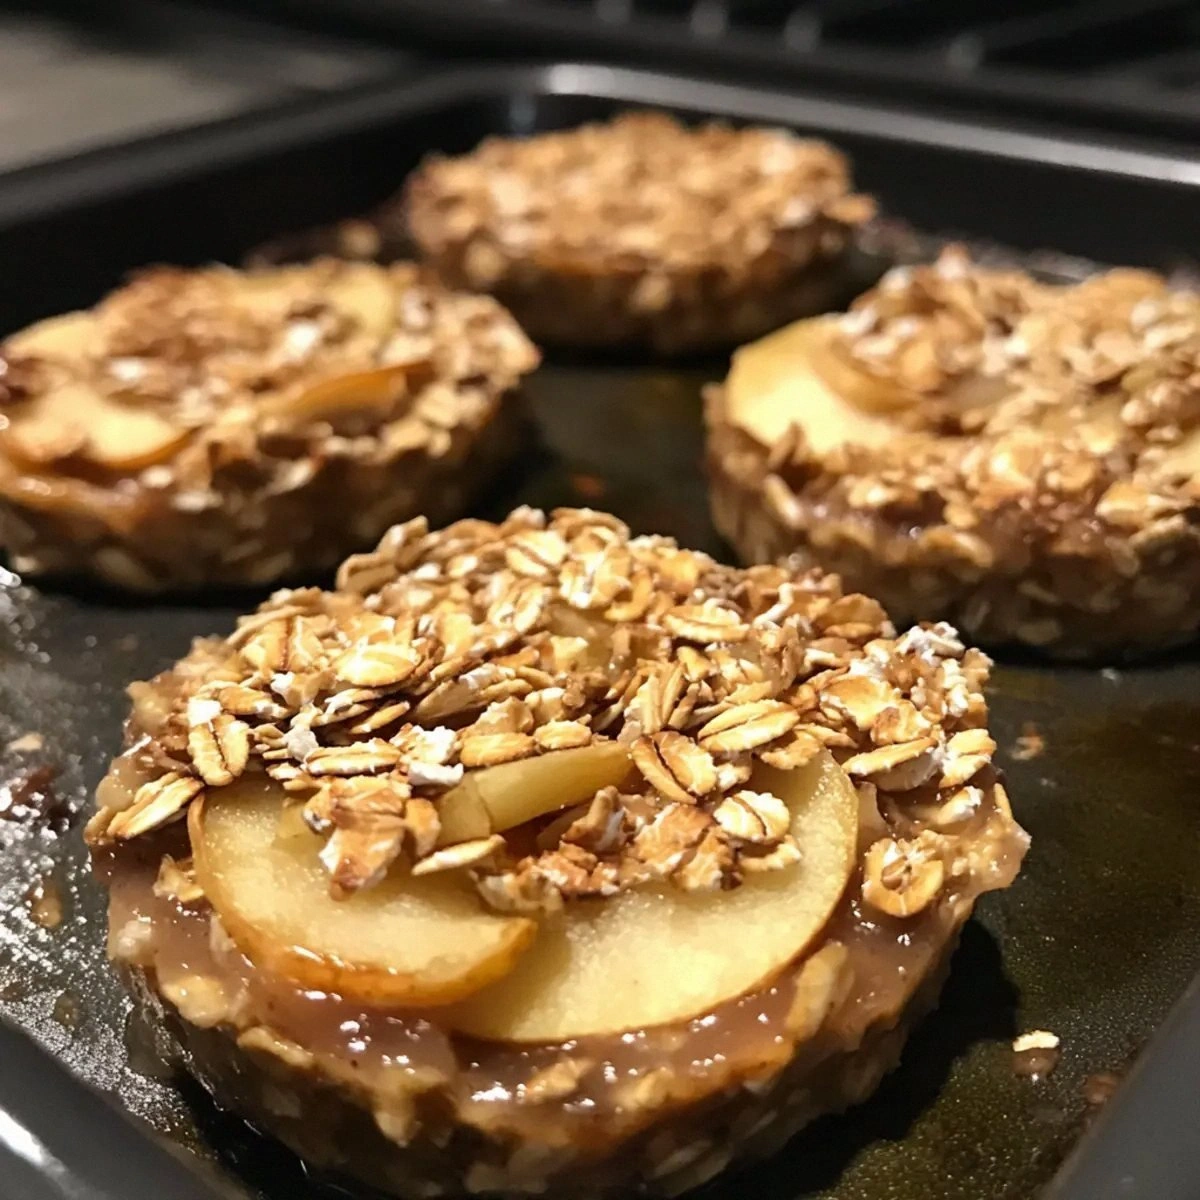
The moment the apples hit the pan, the kitchen filled with a sweet, caramelized aroma that made my eyes water a little. I could hear the sizzle as the butter melted, turning into a glossy, golden coating that clung to each oat cluster. The sound was almost musical, a soft crackle that whispered, “This is going to be delicious.” When I finally pulled the tray out, the snack looked like a handful of tiny, golden moons, each one speckled with cinnamon and a hint of vanilla. I took a bite, and the crunch was immediate—crisp edges that shattered like thin ice, followed by a burst of sweet, honey‑sweet apple and a warm, buttery finish that lingered on the tongue.
What makes this version stand out isn’t just the flavor; it’s the harmony of textures and the sheer simplicity of the process. I’ve stripped the recipe down to the essentials, so you can focus on the cooking rather than juggling a dozen ingredients. The oats provide a hearty base, while the apples add natural sweetness and a chewy contrast. Honey or maple syrup brings depth, and the butter or coconut oil creates that glossy, caramelized crust. Cinnamon and vanilla elevate the whole thing with comforting warmth, and a pinch of sea salt pulls every note together. It’s the kind of dish that feels like a hug in a bowl, but with a crunchy, satisfying bite.
I’ll be honest—I ate half the batch before anyone else got to try it. But that’s the thing about this recipe: it’s so addictive that you’ll want to taste it and not go back for seconds. Picture yourself pulling this out of the oven, the whole kitchen smelling incredible, and handing a tray to a friend who says, “I dare you to taste this and not go back for seconds.” That’s the promise of this humble snack, and it’s hands down the best version you’ll ever make at home. Let me walk you through every single step—by the end, you’ll wonder how you ever made it any other way.
What Makes This Version Stand Out
- Flavor: The combination of apples, honey, and cinnamon creates a sweet, warm profile that feels like a cozy hug. The vanilla adds a subtle depth that prevents the dish from feeling one‑dimensional.
- Texture: The oats give a hearty chew, while the roasted apples contribute a juicy burst. The butter or coconut oil forms a caramelized crust that snaps like a crisp cookie.
- Convenience: No pre‑mixing or complex steps—just toss, roast, and enjoy. This is the ultimate low‑effort, high‑reward breakfast hack.
- Versatility: Works as a breakfast, snack, or dessert. Serve it warm with a drizzle of yogurt or a scoop of ice cream for a decadent twist.
- Ingredient Quality: Using high‑quality rolled oats, fresh apples, and real honey or maple syrup ensures the dish tastes authentic and wholesome.
- Make‑ahead Potential: The roasted oat apple mix can be stored in an airtight container for up to a week, making it perfect for busy mornings.
- Audience Appeal: Most people love the crunch of oats and the sweetness of apples, so it’s a crowd‑pleaser for all ages.
- Seasonality: While you can use any apple variety, using a crisp, slightly tart apple like Honeycrisp or Granny Smith gives a balanced flavor that’s especially delightful in autumn.
Alright, let’s break down exactly what goes into this masterpiece…
Inside the Ingredient List
The Flavor Base
Honey or maple syrup is the sweet backbone of this snack. It coats the oats and apples, creating a glossy, caramelized finish that’s impossible to resist. If you prefer a less sweet version, simply reduce the syrup by a tablespoon and increase the cinnamon to compensate. A good quality syrup also adds subtle floral or woody notes that elevate the overall profile.
The Texture Crew
Rolled oats are the star of the show. They absorb the syrup and butter, turning into a chewy, hearty base that contrasts beautifully with the crisp edges of the roasted apples. If you’re looking for a gluten‑free option, choose certified gluten‑free oats; they’ll behave just like regular oats in this recipe. For a protein boost, sprinkle in a handful of chopped nuts or seeds after roasting.
The Unexpected Star
Vanilla extract is the secret ingredient that ties everything together. It adds a subtle, fragrant warmth that balances the sweetness of the apples and the richness of the butter. If you’re vegan or dairy‑free, coconut oil is a perfect substitute for butter—it gives a slightly tropical note that’s surprisingly complementary.
The Final Flourish
Ground cinnamon and a pinch of sea salt are the finishing touches. Cinnamon brings a spicy warmth, while the salt sharpens the sweetness and enhances the overall flavor. If you’re a fan of a little heat, add a pinch of cayenne pepper to give the snack a surprising kick.
Everything's prepped? Good. Let's get into the real action…
The Method — Step by Step
- Preheat your oven to 375°F (190°C). Line a baking sheet with parchment paper or a silicone mat to prevent sticking. This step ensures even roasting and easy cleanup.
- While the oven heats, wash and dice the apples into bite‑sized cubes. Aim for uniform pieces so they cook evenly and caramelize at the same rate. If you prefer a sweeter bite, peel the apples; otherwise, keep the skins on for extra fiber.
- In a large bowl, combine the rolled oats, diced apples, honey (or maple syrup), and a pinch of sea salt. Toss everything together until the oats are evenly coated. This is the moment of truth—make sure the coating is uniform.
- Melt the butter (or coconut oil) in a small saucepan over low heat, then stir in the ground cinnamon and vanilla extract. The aroma should be warm and inviting, signaling that the flavor base is ready.
- Pour the melted butter mixture over the oat‑apple blend, stirring until every piece is glossy and fragrant. The butter should coat the oats like a velvet blanket.
- Spread the mixture evenly on the prepared baking sheet, making sure each oat cluster is separate. This prevents clumping and ensures each bite has a crisp edge.
- Roast in the preheated oven for 20–25 minutes, or until the edges are golden brown and the apples are tender. Halfway through, give the tray a gentle shake to promote even browning.
- Remove from the oven and let cool on the sheet for 5 minutes before transferring to a wire rack. This cooling period allows the flavors to settle and the texture to firm up.
- Serve warm or at room temperature. For an extra touch, drizzle a little extra honey or sprinkle a pinch of cinnamon on top. Enjoy the crunchy, sweet, buttery symphony that’s sure to delight.
That’s it— you did it. But hold on, I've got a few more tricks that'll take this to another level.
Insider Tricks for Flawless Results
The Temperature Rule Nobody Follows
Most people bake at 400°F, but 375°F gives the oats a golden finish without burning the apples. This lower temperature also allows the butter to meld with the oats more evenly, creating that glossy, velvety coating. If you’re in a hurry, bump the temperature to 400°F for the last 5 minutes, but keep a close eye on the edges.
Why Your Nose Knows Best
The first aroma that hits you—sweet honey, warm cinnamon, and buttery caramel—signals that the mixture is perfectly balanced. If the smell leans too sweet, add a pinch more cinnamon. If it feels flat, a splash of vanilla can bring the fragrance back to life.
The 5‑Minute Rest That Changes Everything
After roasting, let the snack rest on the sheet for exactly 5 minutes before moving it to a rack. This short pause allows the oats to firm up and the flavors to settle, ensuring each bite is crisp on the outside and chewy on the inside. Skipping this step can leave you with a soggy texture.
Use a Parchment‑Coated Sheet
A parchment‑lined sheet prevents the oats from sticking and makes cleanup a breeze. It also allows for even heat distribution, which is key to achieving that perfect golden crust. If you’re using a silicone mat, make sure it’s clean and dry before use.
Keep the Apples Slightly Dry
If your apples are wet, they’ll steam instead of roast, leading to a soggy snack. Pat them dry with a paper towel before mixing. This simple step ensures crisp edges and a satisfying crunch.
Creative Twists and Variations
This recipe is a playground. Here are some of my favorite ways to switch things up:
Spicy Cinnamon Crunch
Add a pinch of cayenne pepper or a dash of smoked paprika to the oat mixture before roasting. The heat pairs wonderfully with the sweetness, creating a savory‑sweet balance that’s perfect for those who like a little kick.
Nutty Granola Boost
Stir in a handful of chopped walnuts or pecans before baking. The nuts add a buttery crunch and a protein punch, making the snack more filling and nutritionally balanced.
Maple‑Glazed Variation
Replace honey with pure maple syrup and add a drizzle of maple on top after baking. The syrup’s earthy sweetness deepens the flavor profile, giving the snack a distinct maple finish.
Chocolate‑Dipped Delight
Once the snack has cooled, dip half of each oat cluster in melted dark chocolate. The chocolate’s bitterness contrasts with the sweet, buttery base, creating a dessert‑like treat.
Herbal Infusion
Stir a teaspoon of dried rosemary or thyme into the oat mixture before roasting. The herbal notes add an unexpected depth, turning the snack into a savory breakfast option.
Storing and Bringing It Back to Life
Fridge Storage
Store the roasted oat apple snack in an airtight container at room temperature for up to 3 days. Keep it in a cool, dry place away from direct sunlight to maintain its crunch.
Freezer Friendly
For longer storage, freeze the snack in a single layer on a parchment‑lined tray, then transfer to a freezer bag. It stays fresh for up to 2 months. Reheat in the oven at 350°F for 5–7 minutes for best texture.
Best Reheating Method
To revive the crunch, heat the snack in a preheated oven at 350°F for 5 minutes. Add a splash of water before reheating to create steam, which keeps the oats from drying out and restores that fresh‑baked feel.