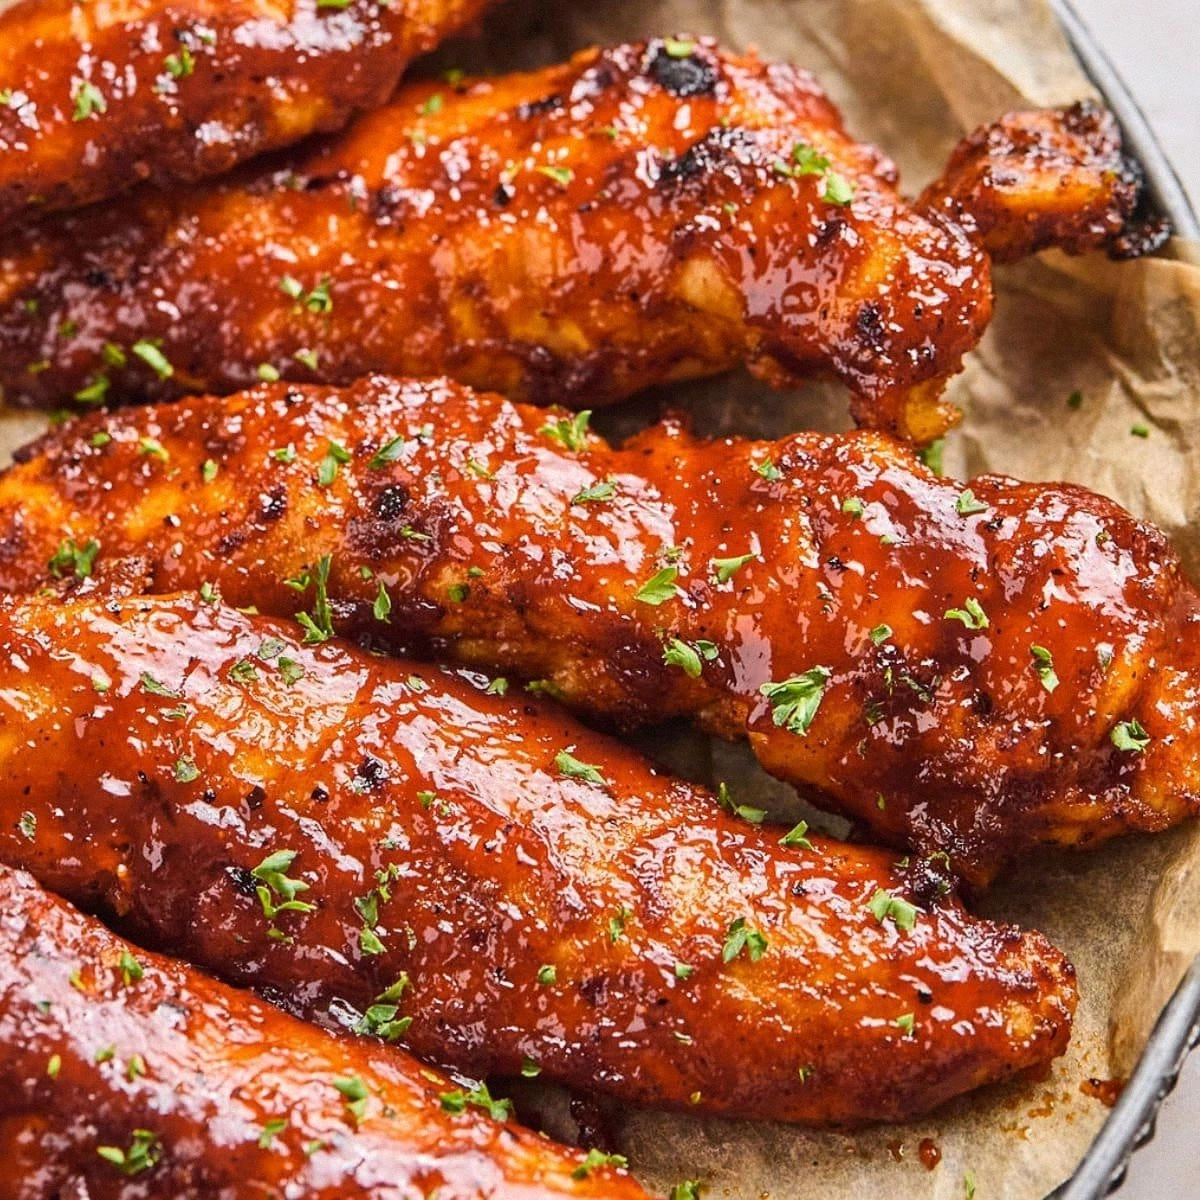
Honey BBQ Chicken Tenders
Picture this: a scorching summer afternoon, a backyard grill that’s more like a furnace, and me, staring at a bag of plain chicken tenders that look like they’ve been through a war. I had a craving that was louder than the sizzling sound of oil on the pan. I was determined to turn those bland strips into a sticky, caramelized masterpiece that would make my friends beg for the recipe. That night, I stumbled onto a method that fused the sweetness of honey with the smoky depth of BBQ sauce, all while keeping the chicken tender and the crust crispy like a well‑done cookie.
When the first tenders hit the pan, the aroma hit me like a warm hug—sweet, smoky, and instantly mouth‑watering. The sound of the sizzling oil was a drumbeat that promised flavor. As the chicken cooked, the glaze thickened, coating each piece in a glossy, caramelized sheen that glistened under the kitchen lights. The texture was a dance between a crunchy exterior and a juicy interior that practically melted in your mouth. I tasted a piece, and it was an explosion of sweet, tangy, and savory notes, with a hint of heat that lingered on the palate.
What makes this version stand out is the balance I struck between sweetness and spice, and the clever use of pickle juice to keep the meat tender while adding a subtle zing. I dared you to taste this and not go back for seconds, and I’ve seen people come back for a third plate. The combination of honey, BBQ sauce, and a splash of pickle juice creates a glaze that sticks like a second skin, yet pulls off the chicken without drying it out. It’s hands down the best version you’ll ever make at home because I’ve refined it through countless trials and errors.
Now, if you’re ready for a recipe that will transform ordinary chicken tenders into a showstopper, let me walk you through every single step. By the end, you’ll wonder how you ever made it any other way. Let’s dive in and turn your kitchen into a flavor laboratory.
What Makes This Version Stand Out
- Flavor Fusion: The marriage of honey and BBQ sauce creates a glaze that’s sweet, smoky, and slightly tangy, giving each tender a complex profile that’s more than the sum of its parts.
- Texture Triumph: The double‑cook method—first searing, then finishing in the oven—locks in juices while forming a crisp, caramelized crust that shatters like thin ice.
- Ingredient Simplicity: With just ten ingredients, you can achieve gourmet results without the need for exotic pantry items.
- Make‑Ahead Friendly: Marinate the tenders a few hours ahead or even overnight, and they’ll still deliver the same depth of flavor.
- Crowd‑Pleaser Factor: These tenders are perfect for parties, game nights, or any gathering where you want a dish that’s both easy to eat and impossible to resist.
- Quality Focus: Fresh, high‑quality chicken tenders and a good‑grade BBQ sauce are the foundation for a dish that shines.
- Versatile Cooking Method: Whether you’re using a skillet, an oven, or a grill, the technique adapts seamlessly.
- Health‑Conscious Twist: The use of buttermilk and pickle juice keeps the dish lower in fat than many fried chicken recipes.
Alright, let's break down exactly what goes into this masterpiece...
Inside the Ingredient List
The Flavor Base
BBQ sauce is the star of the show, providing the smoky backbone that anchors the glaze. The sauce’s acidity cuts through the richness of honey, creating a balanced profile that won’t overwhelm the palate. If you skip the sauce, the dish loses its signature depth and becomes a plain sweet glaze. For a different twist, try a chipotle‑infused BBQ sauce to add a smoky heat that complements the honey’s sweetness.
The Texture Crew
Buttermilk is the secret to that silky interior. Its lactic acid breaks down protein fibers, making the chicken tender and juicy. Olive oil is essential for the initial sear; it creates a golden crust that locks in moisture. Skipping either will result in a drier, less flavorful bite. If you’re on a low‑fat diet, you can replace olive oil with a splash of vegetable broth, but you’ll lose that crispness.
The Unexpected Star
Pickle juice might sound odd, but it’s a game‑changer. The vinegar in the juice tenderizes the chicken while adding a bright, briny note that cuts through the sweetness. If you’re allergic or simply don’t have pickle juice on hand, a splash of apple cider vinegar or lemon juice works well as a substitute.
The Final Flourish
Garlic powder, onion powder, smoked paprika, salt, and pepper are the seasoning backbone. They lift the glaze’s flavors and give the tenders a savory edge that balances the honey’s sweetness. If you’re looking to spice things up, add a pinch of cayenne pepper or a dash of hot sauce. Conversely, if you prefer a milder dish, reduce the smoked paprika and omit the cayenne.
Everything's prepped? Good. Let's get into the real action...
The Method — Step by Step
- Prep the Marinade: In a bowl, whisk together 1/2 cup BBQ sauce, 1 tablespoon honey, 1 tablespoon olive oil, 1 teaspoon garlic powder, 1 teaspoon onion powder, 1/2 teaspoon smoked paprika, 1/4 teaspoon kosher salt, and 1/4 teaspoon black pepper. The mixture should be glossy and well‑combined. If you’re short on time, you can use pre‑mixed BBQ sauce and skip the extra seasonings.
- Marinate the Chicken: Toss the 1 lb chicken tenders in the glaze, ensuring each piece is fully coated. Transfer the mixture to a zip‑lock bag, seal, and refrigerate for at least 30 minutes, or up to 2 hours. The longer the marination, the deeper the flavor infusion.
- Preheat the Skillet: Place a large non‑stick skillet over medium‑high heat. Add 1 tablespoon of olive oil and let it shimmer. The skillet should be hot enough that a drop of water sizzles instantly.
- Seared Perfection: Remove the tenders from the bag, letting excess glaze drip off. Arrange them in a single layer, without overcrowding. Cook for 2–3 minutes per side, until golden brown and the glaze has caramelized into a sticky crust. The sound of the sizzling glaze is music to any cook’s ears.
- Transfer to Oven: Preheat the oven to 400°F (200°C). Place the seared tenders on a parchment‑lined baking sheet, ensuring they’re spaced apart. Bake for 10 minutes, flipping once. This step ensures the interior remains moist while the exterior stays crisp.
- Finish the Glaze: While the tenders bake, pour the remaining glaze into a small saucepan. Bring to a simmer over medium heat, stirring until the glaze thickens to a syrupy consistency—about 5 minutes. This will coat the chicken in a glossy finish that clings to every bite.
- Coat the Tenders: Once the tenders are done baking, remove them from the oven. Brush the thickened glaze over each piece, ensuring even coverage. The glaze should be thick enough to cling but still pourable.
- Serve and Enjoy: Let the tenders rest for 2 minutes before serving. This brief rest allows juices to redistribute, keeping every bite succulent. Plate them with a side of coleslaw or a fresh salad for a complete meal.
- Optional Garnish: Sprinkle chopped fresh herbs, such as parsley or cilantro, for a burst of color and freshness that cuts through the richness.
That's it — you did it. But hold on, I've got a few more tricks that'll take this to another level...
Insider Tricks for Flawless Results
The Temperature Rule Nobody Follows
Many cooks assume any medium heat will work, but the secret is to use a skillet that stays consistently hot. A cast‑iron pan retains heat better than stainless steel, giving you a more even sear. I’ve seen tenders that are unevenly cooked because the pan was too cool; the edges stay raw while the center is overdone. Keep the temperature steady, and you’ll get a perfect golden crust every time.
Why Your Nose Knows Best
When the glaze starts to bubble, the aroma will tell you the right moment to flip the tenders. That sweet, smoky scent is the cue that the crust is forming. If you wait too long, the glaze can burn and create a bitter aftertaste. Trust your nose; it’s a reliable guide to flavor development.
The 5-Minute Rest That Changes Everything
After baking, let the tenders rest for five minutes on a wire rack. This small window allows the juices to redistribute, preventing a dry bite. I once served them immediately, and the first bite was dry; the rest made all the difference. It’s a simple step that elevates the overall experience.
Bringing in the Brine
Adding a splash of pickle juice to the marination step not only tenderizes but also adds a bright, tangy note that balances the honey’s sweetness. If you’re craving a more pronounced tang, increase the pickle juice to 1/3 cup. This tweak turns the dish from sweet to sweet‑and‑sour, a crowd‑pleaser at parties.
Quick Glaze Fix
On a busy night, you can skip the second glaze simmer step and simply drizzle the remaining glaze over the baked tenders. The result is still delicious, though the glaze will be slightly thinner. This shortcut saves time without compromising flavor.
Creative Twists and Variations
This recipe is a playground. Here are some of my favorite ways to switch things up:
Spicy Cajun Kick
Swap the smoked paprika for a tablespoon of Cajun seasoning and add a dash of cayenne pepper. The result is a fiery, aromatic glaze that pairs wonderfully with a cool cucumber salad.
Maple Bourbon Glaze
Replace the honey with maple syrup and add 1 tablespoon of bourbon to the glaze. The caramelized maple notes and subtle whiskey undertones create an indulgent, adult‑friendly version.
Asian Fusion
Use hoisin sauce instead of BBQ sauce and add a splash of soy sauce. Finish with a drizzle of sesame oil and sprinkle toasted sesame seeds for a quick, flavorful twist.
Herb‑Infused Delight
Blend fresh herbs like thyme, rosemary, and oregano into the glaze. The herbal aroma elevates the dish, making it feel like a rustic, farmhouse favorite.
Low‑Carb Option
Omit the honey and replace it with a sugar‑free sweetener, then use a sugar‑free BBQ sauce. The tenders will still caramelize, but with fewer carbs and the same savory satisfaction.
Kid‑Friendly Version
Serve the tenders with a side of honey mustard dipping sauce. The sweet and tangy sauce is a hit with younger palates and adds a playful element to the meal.
Storing and Bringing It Back to Life
Fridge Storage
Cool the tenders completely before placing them in an airtight container. Store in the refrigerator for up to 3 days. Reheat in a preheated oven at 350°F (175°C) for 10 minutes, or until warmed through. The oven keeps the crust crisp.
Freezer Friendly
Wrap each tender individually in plastic wrap and place them in a freezer bag. They’ll stay fresh for up to 2 months. Thaw overnight in the fridge, then reheat as described above.
Best Reheating Method
For the best texture, reheat in a skillet over medium heat, adding a splash of water to create steam. This technique prevents the tenders from drying out and restores the glaze’s glossy finish.
Add a tiny splash of water before reheating — it steams back to perfection.