Look, I was supposed to be on a "clean-eating reset" when my best friend texted me a blurry photo of an Oreo-studded ice-cream cone from some hipster truck in Portland. One glimpse at those midnight-black cookie shards buried in snowy folds of vanilla, and my virtuous week collapsed faster than a meringue in a rainstorm. Within minutes I was raiding the pantry, convinced I could outdo the truck, the parlor, and every store pint that skimps on the good stuff. What followed was three days, six quarts of heavy cream, two near-melt disasters, and one electric hand mixer that may never recover. But I cracked the code: a no-churn Oreo ice cream so loaded with cookies it borders on inappropriate, so velvety it spoons like satin, so addictive that my neighbor—who claims she "doesn’t even like sweets"—stood at my counter and ate straight from the loaf pan while muttering, "I’m not sorry." If you’ve ever been disappointed by store-bought versions that taste like faintly vanilla air with sad, soggy specks, prepare for a revelation. We’re folding in nearly a whole package of Oreos, layering them in three waves so every bite delivers that cocoa-bitter crunch against lush, sweet cream. The base is a scandalously simple condensed-milk whip that needs no churning, no eggs, no babysitting a custard that wants to scramble the second you blink. It’s summer in a bowl, midnight munchies in a scoop, and the answer to every broken heart or hot afternoon. Ready for the fun part? Let me walk you through every single step—by the end, you'll wonder how you ever made it any other way.
What Makes This Version Stand Out
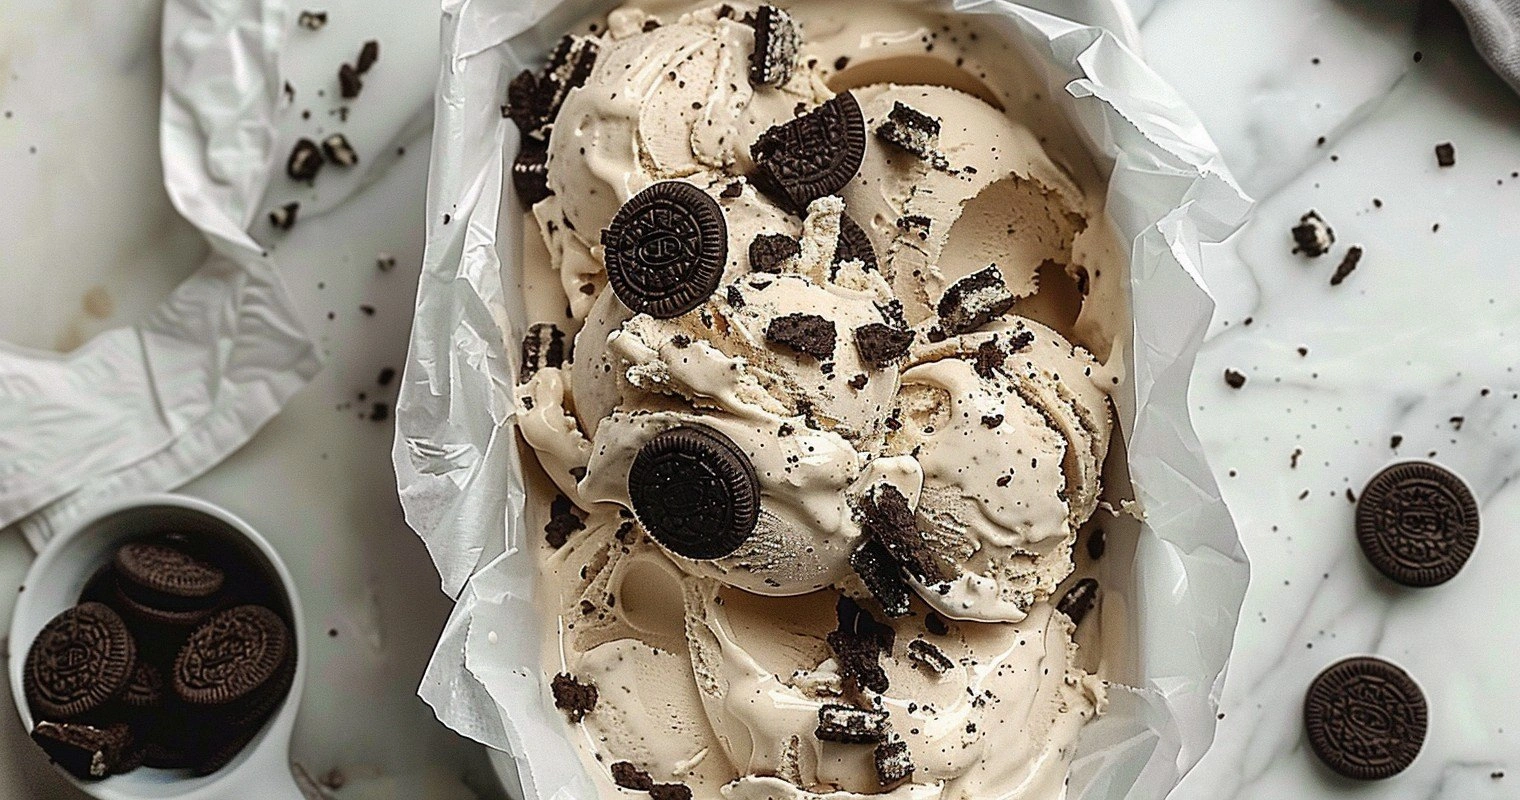
Cookie Overload: We’re talking a full sleeve of Oreos blitzed into buttery rubble and layered at three strategic moments so the cookies stay crisp, not mushy. Every spoonful delivers that iconic black-and-white contrast, like edible piano keys playing your taste buds a symphony.
No-Churn Magic: Forget tempering eggs or waiting for custard bases to chill overnight. Cold heavy cream whipped to stiff peaks plus condensed milk equals instant silk that freezes without a single crystal of iciness. You’ll go from pantry to freezer in fifteen minutes flat.
Salt-Kissed Sweetness: A whisper of flaky sea salt amplifies the cocoa notes and keeps the sweetness from cloying, the same way a drizzle of salt makes caramel taste like it’s wearing a tuxedo. It’s the tiny detail that makes guests close their eyes and sigh.
Texture Theater: We fold in crushed cookies, yes, but we also freeze mini chunks so they shatter like chocolate gravel under your teeth while ribbons of cream stay cloud-soft. It’s the contrast that keeps you excavating the container for "just one more bite."
Make-Ahead Hero: This ice cream stays scoopable straight from the freezer for up to two weeks, thanks to the corn syrup and condensed milk combo. Bake sale Friday? Birthday brunch Sunday? Knock it out tonight and sleep in tomorrow.
Crowd Conversion: I’ve watched gluten-free diehards request "just a sliver" and then return shamelessly for thirds. The recipe is vegetarian, nut-free, and can be made gluten-free with GF sandwich cookies. Translation: everyone at the barbecue gets dessert.
Alright, let's break down exactly what goes into this masterpiece...
Inside the Ingredient List
The Flavor Base
Heavy cream is the star here, not just any cream—look for 36–40% milkfat. Anything leaner whips watery and freezes icy, while ultra-pasteurized still works but takes longer to peak. The condensed milk is your built-in custard; it brings caramelized milk sugars and body so you can skip eggs altogether. A glug of pure vanilla extract rounds sharp edges and fools tasters into thinking you steeped a vanilla bean for hours. Finally, a scant teaspoon of corn syrup might seem weird, but it’s insurance against rock-hard freezer texture; it keeps things scoopable even after a week buried beside frozen peas.
The Texture Crew
Oreos are obvious, yet technique matters. We pulse half the cookies into rubble and roughly chop the rest so some shards melt into the cream while others stay chunky. If you go all-fine, you’ll have grey ice milk; all-chunky and they’ll tumble out onto the cone like gravel on ice skates. A pinch of espresso powder deepens cocoa without tasting like coffee—think of it as Photoshop for chocolate. And flaky sea salt is the secret handshake between bitter cookie wafers and sweet cream, making both flavors pop like 3-D glasses for your tongue.
The Unexpected Star
Here’s where I lose purists: a tablespoon of cream cheese. Not enough to taste tangy, just enough to add subtle cheesecake body that makes people ask, "Why is this so addictively creamy?" Whisk it smooth with the condensed milk first; lumps are the enemy of velvet. If you’re dairy-free, swap in vegan cream cheese and coconut condensed milk—tropical, but still swoon-worthy. And if Oreos aren’t your jam, any sandwich cookie works, though you’ll lose the iconic cocoa-bitter edge we’re chasing.
The Final Flourish
Reserve a handful of cookie crumbs for the top; they’ll form a midnight crust that looks bakery-bought. A drizzle of melted dark chocolate sets into snappy shards that crack under your spoon, adding one more texture layer. If you’re feeling fancy, roll the edges of scoops in more crumbs for truffle-like glamour. Trust me, presentation eats first, and this dessert shows up dressed like it owns the freezer aisle.
Everything's prepped? Good. Let's get into the real action...
The Method — Step by Step
- Line a 9-by-5-inch loaf pan with parchment, leaving wings that hang over the sides like a sling. This saves you from chiseling concrete-hard ice cream out later. Pop the pan into the freezer so it’s ice-cold when you fill it; a warm pan melts your carefully whipped base on contact, and we are not here for soup.
- Separate your Oreos: half go into the food processor for fine crumbs, half get roughly chopped by hand for chunky texture. Think sand versus pebbles—both have jobs to do. If you only have a rolling pin, chuck cookies into a zip bag and whale away until your neighbors wonder what you’re demolishing. Set aside a quarter-cup of the fine crumbs for the final dusting; they’ll become your midnight snow.
- Measure condensed milk into a large bowl, add cream cheese, vanilla, espresso powder, and salt. Whisk like your life depends on silk. Tiny flecks of cream cheese sabotage texture, so keep whisking until the mixture shines like melted vanilla taffy. Your arm will complain; tell it this is the only workout you’re doing today.
- Pour cold heavy cream into a chilled bowl and beat on medium-high until you see soft trails that hold for a second before sinking back. You want floppy peaks, not stiff Styrofoam—over-whipped cream turns grainy when folded. When the beaters leave whispery lines, you’re at the sweet spot. Stop and admire those billows; this is homemade clouds in bowl form.
- Scrape a big dollop of whipped cream onto the condensed-milk base and stir vigorously to lighten. This sacrificial spoonful loosens the dense mixture so you can fold the rest without deflating. Think of it as diplomatic cream negotiating a peace treaty between dense and airy.
- Add remaining whipped cream in three additions, using a rubber spatula to lift and fold like you’re writing the letter J through clouds. Rotate the bowl a quarter-turn after each fold so you don’t miss pockets of unmixed cream. The goal is a homogenous mousse that still holds air—stop the second you see no more white streaks.
- Dump in the finely processed Oreo crumbs and most of the chunky pieces. Fold just until dispersed; over-mixing stains the cream a murky grey. You want distinct black flecks, not cookies-and-cream soup. The mixture will look likeCookies exploded in a snowstorm—exactly right.
- Retrieve your icy loaf pan and plop in half the mixture, smoothing to the corners with an offset spatula. Scatter a handful of reserved chunky cookies for a hidden treasure layer. Top with remaining mixture, smoothing again like you’re frosting the world’s tiniest cake. Tap the pan on the counter to expel sneaky air bubbles that cause ice pockets later.
- Blanket the top with your saved fine crumbs, then drizzle melted dark chocolate in chaotic zigzags. Drag a toothpick through for Pinterest-worthy swirls if you must, but honestly, rustic looks delicious. Press a sheet of plastic wrap directly onto the surface to ward off freezer burn, then freeze at least six hours or until a spoon stands at attention like a proud sentinel.
That's it—you did it. But hold on, I've got a few more tricks that'll take this to another level...
Insider Tricks for Flawless Results
The Temperature Rule Nobody Follows
Everything that touches cream must be cold—bowl, beaters, even the spatula. Warm tools melt fat before it traps air, giving you butter soup instead of lofty peaks. I stash my spatula in the freezer next to the bowl; it feels nerdy until you taste the difference. Room-temperature ingredients are the silent killer of no-churn dreams.
Why Your Nose Knows Best
When the whipped cream starts to smell faintly sweet and dairy-rich, you’re seconds from perfect peaks. Over-beaten cream smells slightly sour and metallic, like a penny in buttermilk. Trust your senses; they’ve been honed since childhood cereal milk. If you’re unsure, stop and lift the beaters—cream should stand in proud peaks that tip just a little, like a jaunty beret.
The 5-Minute Rest That Changes Everything
After folding, let the bowl sit five minutes so air distributes evenly. Any sooner and you’ll glop half-bubbles into the pan like uneven cake batter. Meanwhile, raid the freezer for a tasting spoon—chef’s privilege. Those few minutes let the mixture thicken just enough to hold cookie chunks in suspension instead of letting them sink to the bottom like buried treasure.
Layer Like a Lasagna of Nostalgia
Instead of random folds, layer cookies in three waves: base, middle, top. You create strata that ensure no bite is cookie-barren. Kids love excavating the "cookie core," adults pretend they’re above the gimmick, then secretly hunt for it. A friend tried skipping layers once—let’s just say it didn’t end well.
The Plastic-Wrap Seal of Destiny
Press wrap directly onto the surface, not stretched across the pan rim. This prevents ice crystals from snowing on your pristine cream. I tuck the wings over like a bedtime blanket, whispering sweet dreams to future me who gets to scoop this beauty at 2 a.m. with only the fridge light for company.
Creative Twists and Variations
This recipe is a playground. Here are some of my favorite ways to switch things up:
Peanut Butter Oreo Avalanche
Swirl in half a cup of creamy PB warmed for ten seconds so it ribbons instead of clumping. The salt and roasted notes make the chocolate cookies taste like Snickers’ sophisticated cousin. Top with chopped honey-roasted peanuts for extra crunch that sticks to your molars in the most delightful way.
Mint Chocolate Moonlight
Swap vanilla extract for peppermint, add three drops green food coloring if you want that nostalgic parlor vibe, and fold in Andes mint chips along with the cookies. The result tastes like Girl Scout cookies took a spa day in ice-cream form. I dare you to taste this and not go back for seconds.
Espresso Martini Grown-Up Scoop
Dissolve a tablespoon of instant espresso in a tablespoon of hot water, cool, and whisk into the condensed-milk base. Add two tablespoons of coffee liqueur for a boozy kick that keeps texture soft. Serve in chilled martini glasses with a twist of orange zest—dessert and nightcap in one.
Strawberry Shortcake Remix
Replace half the Oreos with freeze-dried strawberry pieces and fold in tiny cubes of pound cake. The berry tang plays off the cocoa like chocolate-covered strawberries at a summer wedding. Kids call it "pink cookies-and-cream," adults call it dangerous.
Coconut Dream Beach Shack
Use coconut condensed milk and fold in toasted coconut flakes plus chopped Golden Oreos instead of classic. You’ll taste like a Mounds bar went on vacation and sent postcards. Add a squeeze of lime zest over each scoop for the tropical finish that makes you hear waves.
Salted Caramel Pretzel Carnival
Swirl in half a cup of cooled salted caramel and a cup of crushed pretzels. The sweet-salty-cocoa triangle hits every pleasure center science has cataloged. Pro tip: drizzle extra caramel on top so it freezes in amber shards that crack under the spoon like brûlée sugar.
Storing and Bringing It Back to Life
Fridge Storage
This is a freezer-only dessert; the fridge turns it into a melted milkshake faster than you can say "portion control." If you must soften, ten minutes on the counter is plenty. Any longer and you’ll need a straw, which honestly isn’t the worst problem to have.
Freezer Friendly
Wrap the pan in a second layer of foil to prevent rogue freezer odors from hitching a ride. Stored this way, the ice cream stays prime for two weeks, though I’ve never witnessed it survive past three days. For longer storage, scoop into pint containers, press parchment on top, and hide behind frozen peas—out of sight, out of midnight-munching mind.
Best Reheating Method
There is no reheating, only strategic thawing. Microwave at 50% power for five-second bursts if you’re desperate, but the texture suffers. The noble path is patience: ten minutes room temp or five minutes in the fridge door. Add a tiny splash of milk and re-whip if you accidentally over-soften; it brings back the loft like CPR for cream.