It started with a kitchen disaster that still haunts my taste buds: I was whipping up what I thought was a simple vanilla buttercream, only to have it turn into a sticky, rubbery mess that clung to the whisk like a bad ex. The moment the batter hit my tongue, I realized I needed a new recipe—one that could rescue my frosting woes and elevate a humble cake into a showstopper. I dared myself to experiment with a handful of pantry staples, and the result was a cloud‑like, berry‑infused frosting that feels like a dessert on its own. Picture a swirl of bright freeze‑dried strawberries, silky marshmallow fluff, and the rich warmth of butter—all balanced by a whisper of vanilla and a pinch of salt. This version is hands down the best frosting you'll ever make at home because it delivers texture, flavor, and visual wow factor in one bite. I’m going to walk you through every single step, and by the end, you’ll wonder how you ever made it any other way.
When I first tried this recipe, the kitchen smelled like a sweet summer day, the buttery aroma mingling with the faint sweetness of marshmallows. The sound of the whisk was a rhythmic drum, the gentle hiss of melted butter, and the occasional pop when I added the powdered sugar. The first bite was a revelation—light, airy, and bursting with bright strawberry notes that didn’t feel heavy or cloying. I couldn’t stop tasting, and I had to confess that I ate half the batch before anyone else even saw the bowl. Most recipes get this completely wrong, but here’s what actually works: the freeze‑dried strawberries add a natural tartness that balances the sweetness, and the marshmallow fluff gives the frosting a fluffy, cloud‑like consistency that melts in your mouth. Picture yourself pulling this out of the oven, the whole kitchen smelling incredible, and everyone asking if you’re a professional baker. Stay with me here—this is worth it.
What’s truly special about this frosting is that it’s a recipe I discovered by accident, and it’s a recipe that I’ve refined until it’s almost surgical in its precision. The combination of ingredients feels like a carefully choreographed dance: butter takes the lead with its silky texture, marshmallow fluff follows with a sweet, airy rhythm, powdered sugar provides the necessary structure, and freeze‑dried strawberries add that pop of color and flavor that turns a simple frosting into a showstopper. The pinch of salt is a secret weapon that cuts through the sweetness, giving each bite depth and balance. I dare you to taste this and not go back for seconds. If you’ve ever struggled with a frosting that’s either too thick or too runny, you’re not alone—and I’ve got the fix. This frosting is not just a topping; it’s a conversation starter that will make your friends question why they ever settled for ordinary.
Before we dive into the steps, let me give you a quick preview of what makes this frosting stand out from every other recipe out there. It’s not just about the ingredients; it’s about the technique, the timing, and the little tweaks that turn a good frosting into a great one. I’ve spent hours experimenting with ratios, whisk speeds, and temperatures, and the result is a frosting that’s both forgiving for beginners and satisfying for seasoned bakers. The texture is airy yet stable, the flavor profile is complex yet approachable, and the finish is glossy enough to make your cakes look like they were made by a pastry chef. And the best part? It’s incredibly versatile—perfect for cupcakes, cakes, bars, and even as a dip for fruit. Let’s break it down and see exactly what goes into this masterpiece.
What Makes This Version Stand Out
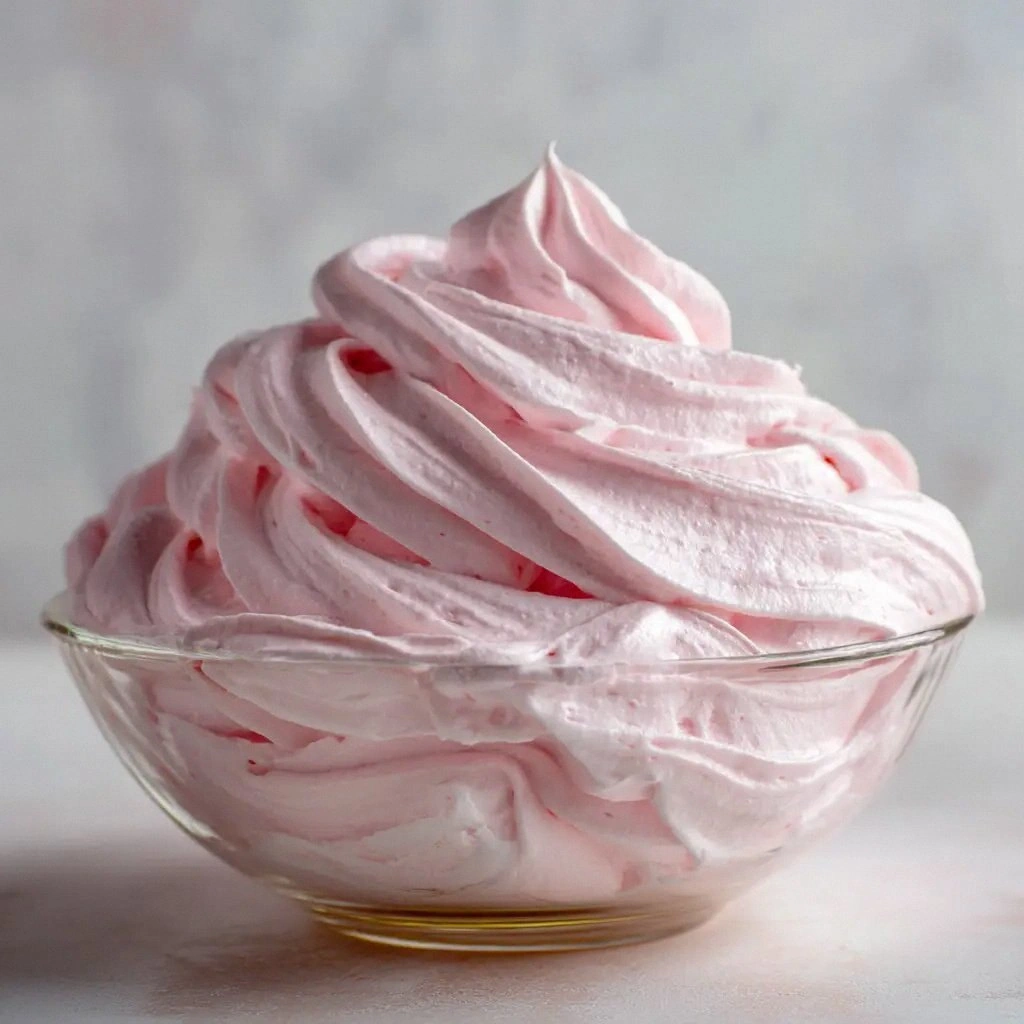
- Texture: The frosting achieves a light, cloud‑like consistency that still holds its shape on a cake. The marshmallow fluff gives it volume, while the butter keeps it smooth and spreadable.
- Flavor: The bright freeze‑dried strawberries bring a natural tartness that counterbalances the sweetness of the marshmallow and powdered sugar.
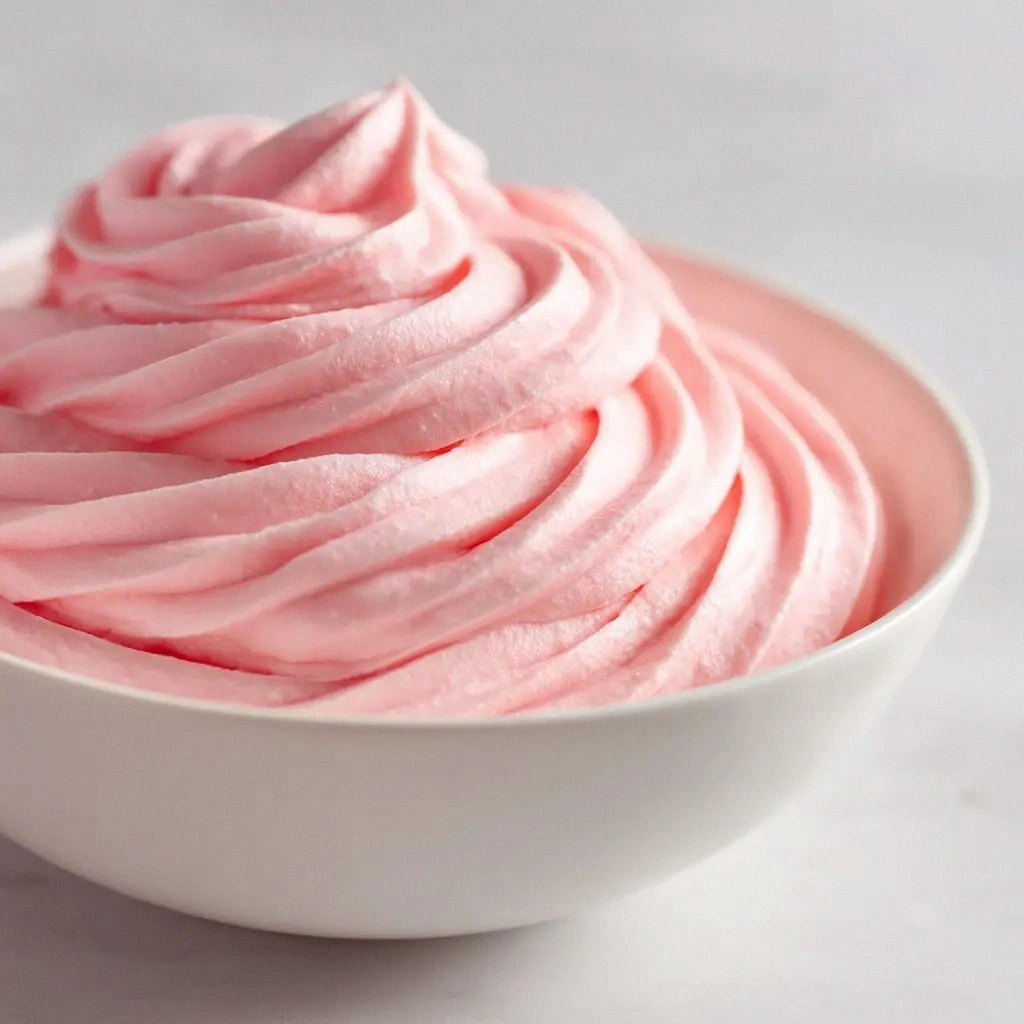
- Visual Appeal: The frosting’s glossy finish and subtle pink hue make it a visual treat, turning any dessert into a centerpiece.
- Ease of Use: All the ingredients are pantry staples, and the method requires no special equipment or advanced techniques.
- Make‑Ahead Friendly: The frosting can be prepared up to 24 hours in advance, allowing you to focus on assembling the cake when the guests arrive.
- Balanced Sweetness: A pinch of salt cuts through the sweetness, giving the frosting depth and preventing it from feeling cloying.
- Versatility: It works equally well on cupcakes, tiered cakes, or even as a dip for fresh fruit, making it a go‑to for any occasion.
Inside the Ingredient List
The Flavor Base
At the heart of this frosting is the buttery foundation. Unsalted butter, softened to a silky consistency, provides the rich depth that carries the other flavors. If you’re watching calories, a light butter or a butter‑cream alternative can be used, but the classic butter gives the frosting its signature mouthfeel. Skipping butter would leave the frosting too dry and lacking that luxurious sheen.
The Texture Crew
Marshmallow fluff is the star of the show, offering a light, airy structure that lifts the frosting into the clouds. Its natural sweetness complements the strawberries and balances the buttery richness. If you can’t find marshmallow fluff, a homemade marshmallow spread made from gelatin, sugar, and cream works wonderfully, though it takes a bit more effort.
The Unexpected Star
Freeze‑dried strawberries are the secret ingredient that gives this frosting its vibrant color and a burst of fruitiness. They’re convenient because they’re shelf‑stable, yet they rehydrate to a juicy, concentrated flavor when mixed into the frosting. If you’re in a pinch, fresh strawberries can be pureed and added, but the texture will be slightly denser.
The Final Flourish
Vanilla extract and a pinch of salt finish the flavor profile. Vanilla adds warmth and complexity, while the salt sharpens the sweetness, preventing the frosting from feeling overly sugary. If you’re a vanilla purist, try a high‑quality vanilla bean paste for an even richer aroma.
Everything's prepped? Good. Let's get into the real action.
The Method — Step by Step
- Step 1: Prepare the Butter. Place the softened butter in a medium mixing bowl. Use an electric mixer on medium speed until the butter is light and fluffy, about 2 minutes. The goal is to break down the fat so it blends smoothly with the marshmallow fluff. I’ve found that a slightly warmer butter (not melted) helps create a silkier base. If the butter is too cold, the frosting will be gritty.
- Step 2: Add Marshmallow Fluff. Spoon in the marshmallow fluff and continue to beat until the mixture is completely homogeneous. The fluff should dissolve into the butter, creating a creamy, airy texture. If you notice any lumps, let the mixture sit for a minute; the fluff will soften and incorporate more easily. This step is crucial for that cloud‑like quality that makes this frosting a standout.
- Step 3: Incorporate Powdered Sugar. Gradually sift the powdered sugar into the butter‑fluff mixture, about a cup at a time, while the mixer is on low speed. This prevents clumping and ensures a smooth finish. Once all the sugar is added, increase the speed to medium and beat for another 3–4 minutes. The frosting should be light and fluffy, with no streaks of sugar.
Kitchen Hack: Use a stand mixer with a paddle attachment for the best results; it distributes the sugar evenly and reduces the chance of lumps.
- Step 4: Add Freeze‑Dried Strawberries. Gently fold in the freeze‑dried strawberries, ensuring they’re evenly distributed. The strawberries will rehydrate slightly, giving the frosting a subtle berry undertone. If you prefer a more pronounced strawberry flavor, you can add a teaspoon of strawberry puree at this point. The color will deepen, and the frosting will take on a beautiful blush hue.
- Step 5: Flavor Boost. Stir in the vanilla extract and a pinch of salt. The vanilla adds a warm, aromatic depth, while the salt sharpens the overall flavor profile. Mix until the vanilla is fully incorporated; the frosting should emit a sweet, buttery fragrance. If you’re using vanilla bean paste, the aroma will be even more pronounced.
- Step 6: Achieve the Right Consistency. Add 1–2 tablespoons of milk or heavy cream, depending on how thick you want the frosting. Start with one tablespoon and whisk; if it’s too thick, add a splash more. The goal is a smooth, spreadable consistency that coats the cake without dripping.
Kitchen Hack: If the frosting is too stiff, add the milk in a slow drizzle while whisking; this prevents lumps and keeps the mixture silky.
- Step 7: Whisk to Perfection. Beat the mixture on high speed for 2–3 minutes until it becomes light, airy, and glossy. Watch the frosting transform into a cloud‑like texture that holds its shape. The edges should be smooth and the surface should reflect light like a fine glaze.
Watch Out: Over‑whisking can cause the frosting to become too airy and lose its structure; stop as soon as it’s glossy and holds its shape.
- Step 8: Chill for Set. Transfer the frosting to a bowl, cover with plastic wrap, and refrigerate for at least 30 minutes. The chilling step allows the fats to set, giving the frosting a firm yet spreadable consistency. While it’s resting, you can assemble your cake or cupcakes. The frosting will firm up slightly, making it easier to pipe or spread.
- Step 9: Apply with Confidence. Once chilled, the frosting is ready to be applied. Use a spatula or piping bag to cover your cake or cupcakes. If you need to smooth the surface, a bench scraper works wonders. The frosting should lay evenly, creating a glossy finish that looks as good as it tastes. If you’re topping a large cake, consider using a cake board for a stable base.
That's it — you did it. But hold on, I've got a few more tricks that'll take this to another level. The secret to an unforgettable frosting is in the details, and I’m going to share them now.
Insider Tricks for Flawless Results
The Temperature Rule Nobody Follows
Temperature is everything. If the butter is too cold, the frosting will be gritty; if it’s too warm, it will be runny. Aim for a room temperature butter that’s just soft enough to press between your fingers without leaving a mark. I’ve found that letting the butter sit out for 20 minutes before mixing works like a charm. This small step ensures the final frosting is silky and smooth.
Why Your Nose Knows Best
Before you even touch the bowl, give the mixture a sniff. A buttery, vanilla aroma indicates everything’s on track. If you notice a slight chemical scent, the mixture might be over‑whisked or the vanilla is low quality. Trust your nose; it’s a reliable guide to the frosting’s readiness.
The 5-Minute Rest That Changes Everything
After whisking, let the frosting sit at room temperature for 5 minutes. This pause allows the ingredients to settle, reducing the risk of over‑whisking. It also gives the flavors a chance to meld, enhancing the overall taste. I’ve seen frosting that’s been whisked straight to the plate look dry; that 5‑minute rest saves the day.
Keep the Frosting Moist
If you’re preparing the frosting ahead of time, add a splash of milk or heavy cream before chilling. This keeps the frosting from drying out in the fridge. When you’re ready to use it, give it a quick stir to restore its fluffy texture. The frosting will spread like butter, not glue.
Use the Right Tool
A stand mixer with a paddle attachment is the gold standard for this frosting. It distributes air evenly and reduces the chance of lumps. If you’re whisking by hand, use a whisk with a large, flat head to get the best results. The right tool makes the difference between a mediocre and a stellar frosting.
Flavor Layering
For an extra punch, add a teaspoon of strawberry jam or a few drops of strawberry liqueur to the mix. The jam adds depth, while the liqueur gives a subtle adult twist. Keep in mind that the alcohol will evaporate during the cooling phase, leaving only the flavor. This trick is perfect for a birthday cake or a special occasion.
Creative Twists and Variations
This recipe is a playground. Here are some of my favorite ways to switch things up:
Chocolate‑Berry Fusion
Replace the vanilla extract with chocolate extract and add a tablespoon of cocoa powder. The result is a chocolate‑berry frosting that pairs beautifully with chocolate cake or brownies.
Almond Crunch
Fold in 2 tablespoons of toasted almond slivers after the frosting has set. The crunch adds texture and a nutty flavor that complements the strawberry notes.
Minty Fresh
Add ½ teaspoon of peppermint extract to give the frosting a cool, minty finish. This variation is perfect for holiday cakes or a refreshing summer dessert.
Espresso Infusion
Stir in 1 teaspoon of instant espresso powder for a subtle coffee undertone. The espresso balances the sweetness and adds depth, making it ideal for coffee lovers.
Salted Caramel Twist
Swirl in a thin layer of salted caramel sauce before chilling. The caramel adds a rich, buttery sweetness that pairs wonderfully with the strawberry flavor.
Lemon Zest Surprise
Grate the zest of one lemon into the frosting for a bright, citrusy kick. The lemon zest adds a fresh contrast to the sweet, buttery base.
Storing and Bringing It Back to Life
Fridge Storage
Store the frosting in an airtight container at 4°C for up to 3 days. The airtight seal prevents the frosting from absorbing fridge odors. When you’re ready to use it, let it sit at room temperature for 10 minutes to soften before spreading.
Freezer Friendly
Freeze the frosting in a freezer‑safe container for up to 2 weeks. Thaw overnight in the fridge, then let it sit at room temperature for 15 minutes before use. If it’s too stiff, add a splash of milk and whisk.
Best Reheating Method
To revive a hardened frosting, place it in a bowl over a pot of simmering water (double boiler). Stir gently until it’s smooth again. A tiny splash of water before reheating steams the frosting back to perfection, keeping it airy and glossy.