It all started on a rainy Saturday when I was trying to rescue a batch of over‑cooked pasta from the pot, and the kitchen smelled like a disaster zone. I stared at the soggy noodles, the sauce clinging like a bad case of gum, and thought, “This is a sign.” I reached for the pantry, grabbed every condiment that could rescue a dish, and the idea of a cheesy, saucy, sloppy masterpiece was born. The moment the skillet hit the stove, the sizzle was louder than a drum solo, and I could hear the future taste buds cheering.
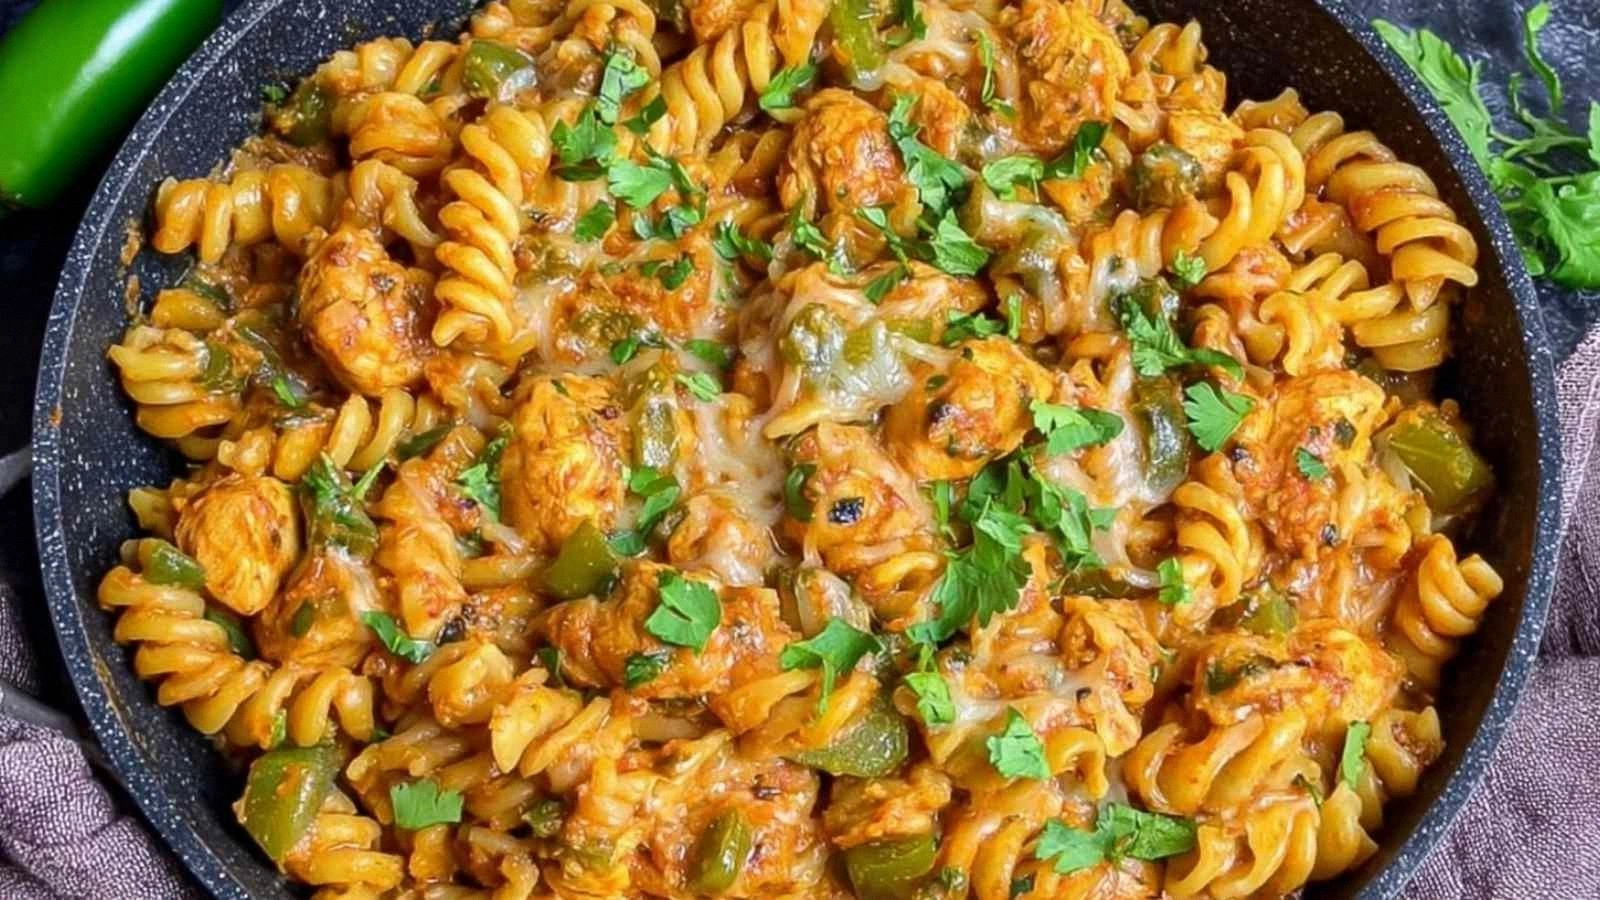
Picture this: the ground beef browning to a deep caramel, the onions turning translucent and sweet, the bell pepper adding a pop of color that makes your eyes dance, and the garlic releasing a perfume that lingers like a secret handshake. The tomato sauce thickens, the mustard powder gives a subtle kick, and the cheddar melts into a creamy blanket that coats every bite like velvet. Every spoonful is a symphony of savory, sweet, and a hint of heat that keeps your palate guessing. I dare you to taste this and not go back for seconds; the moment you bite, you'll feel like you’ve just stumbled into a secret kitchen club.
What sets this version apart from the countless sloppy joe recipes out there is the deliberate layering of flavors and textures that turns a simple sandwich into a culinary revelation. Instead of the usual bland mix, we add a dash of Worcestershire for umami, a spoonful of brown sugar to balance acidity, and a pinch of mustard powder that sneaks a tangy twist. The cheese isn’t just a topping; it’s an integral part of the sauce, creating a molten, gooey consistency that clings to the buns. Most recipes get this completely wrong by adding cheese at the end or using a bland sauce; here, the cheese melts into the meat, forming a unified, indulgent bite.
And there’s a technique that will blow your mind: after browning the meat, we’ll let it rest on a plate for a minute before adding the vegetables. This small pause allows the fat to redistribute, giving the meat a richer flavor and a firmer bite. The result is a sloppy joe that doesn’t feel greasy but instead feels hearty and comforting. Stay with me here—this is worth it, because by the end of this guide, you’ll wonder how you ever made it any other way.
What Makes This Version Stand Out
- Flavor Depth: The combination of Worcestershire, mustard powder, and brown sugar creates a complex taste profile that feels both familiar and adventurous. This isn’t a one‑dimensional sauce; it’s a layered masterpiece that evolves with each bite.
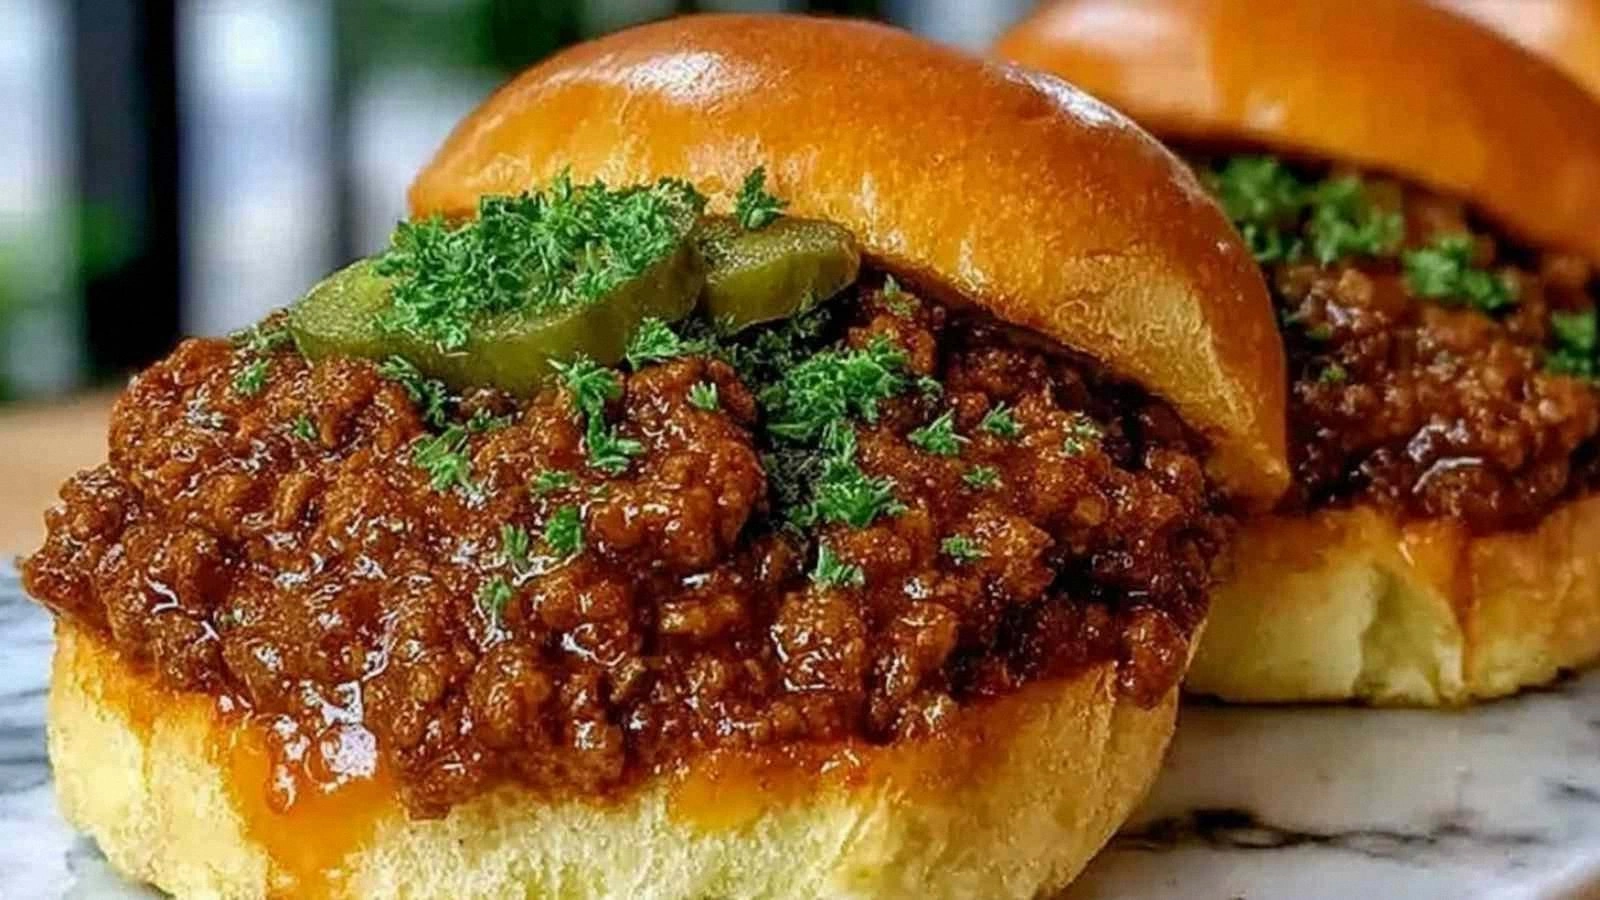
- Cheese Integration: Cheddar isn’t merely a topping—it melts into the meat, forming a silky, cohesive texture that coats the bun like a velvet blanket. The result is a gooey, satisfying mouthfeel that keeps you coming back.
- Texture Contrast: The crisp edges of the sautéed onions and bell pepper give a subtle crunch that contrasts with the smooth, rich sauce. This interplay of textures elevates the dish from simple to unforgettable.
- Make‑Ahead Friendly: The sauce thickens beautifully when refrigerated, and reheating restores the original flavor. It’s a perfect choice for busy weeknights or weekend gatherings.
- Ingredient Quality: Using lean ground beef ensures a lean yet juicy base, while fresh vegetables add brightness. The careful selection of each component guarantees the best possible result.
- Crowd‑Pleaser: Whether you’re feeding a family, a group of friends, or a potluck, the bold flavors and comforting texture make this dish a guaranteed hit. Everyone will ask for the recipe—trust me, it’s that good.
- Versatility: The sauce can double as a dip, a topping for baked potatoes, or a filling for tacos. Its adaptability makes it a staple in any kitchen.
- Time Efficiency: From prep to plate, the entire process takes less than an hour. You’ll have a gourmet meal on the table without sacrificing precious time.
Inside the Ingredient List
The Flavor Base
Ground beef is the heart of any sloppy joe, but choosing lean ensures the dish stays juicy without excess grease. The 1‑lb portion is perfect for four servings, offering a generous amount of meat that carries the sauce. If you prefer a richer flavor, swap in a 70/30 blend, but watch the fat content—too much can make the sauce runny.
Tomato sauce and paste are the backbone of the sauce’s body. The 15‑oz can provides a robust tomato flavor, while the 2 tablespoons of paste thicken the mixture and intensify the taste. If you’re looking for a thicker consistency, add an extra tablespoon of paste; the result is a sauce that clings to the buns like a velvety coat.
The Texture Crew
Yellow onions add a sweet, caramelized note when sautéed until golden. They also contribute a subtle crunch that balances the creamy cheese. For a sharper bite, use red onions, but they may color the sauce slightly. The green bell pepper brings a fresh, peppery bite that cuts through the richness of the meat.
Garlic, with its bold aroma, is the silent hero of many sauces. Two cloves minced into the skillet release a fragrant steam that permeates the entire dish. If you’re a garlic enthusiast, double the amount; if not, keep it to the minimum to avoid overpowering the other flavors.
The Unexpected Star
Worcestershire sauce might seem like an odd addition, but it introduces a subtle umami depth that elevates the entire sauce. A tablespoon is enough to bring a complex savory note without masking the tomato base. If you’re allergic or simply dislike it, a splash of soy sauce or a dash of soy‑based Worcestershire will do the trick.
Brown sugar balances the acidity of the tomatoes, adding a caramelized sweetness that lingers on the tongue. One tablespoon is the sweet spot—too much and the sauce becomes syrupy, too little and it feels sharp. This small tweak transforms an ordinary sauce into a gourmet experience.
The Final Flourish
Shredded sharp cheddar cheese is the crowning glory, melting into the sauce to create a silky, gooey texture that clings to the buns. A cup is enough to coat the meat evenly and provide a creamy finish. If you prefer a sharper bite, opt for a aged cheddar or a pepper jack for a subtle kick.
Mustard powder, chili powder, salt, and pepper are the finishing touches that bring harmony to the dish. Mustard powder adds a tangy depth; chili powder offers a gentle heat that won’t overwhelm the palate. Salt and pepper are essential to bring all the flavors together—taste as you go, and adjust accordingly.
Everything's prepped? Good. Let's get into the real action—time to cook!
The Method — Step by Step
- Heat a large skillet over medium‑high and add the 1‑lb lean ground beef. Break it apart with a spatula, letting the meat brown evenly. The sizzling sound should be loud enough to announce the start of flavor town. Once the beef is no longer pink, drain the excess fat to keep the sauce from becoming too greasy.
- Add the diced yellow onion, diced green bell pepper, and minced garlic to the pan. Sauté until the onions turn translucent and the peppers soften, about 5 minutes. The aroma should be intoxicating—sweet, earthy, and slightly peppery. This is the moment of truth: if the veggies are undercooked, the whole dish will feel flat.
- Stir in the 2 tablespoons of tomato paste, 1 tablespoon of Worcestershire sauce, 1 tablespoon of brown sugar, 1 teaspoon of mustard powder, 0.5 teaspoon of chili powder, and a pinch of salt and pepper. Mix until the paste fully incorporates, creating a thick, fragrant roux. The mixture should smell toasty, with a hint of caramel from the sugar.
- Pour in the 15‑oz can of tomato sauce, reduce the heat to low, and let the mixture simmer gently for 20 minutes. The sauce will thicken, and the flavors will meld into a harmonious whole. Stir occasionally to prevent sticking; the edges should start pulling away from the pan, signaling readiness.
- Add the shredded cheddar cheese to the skillet and stir until it melts completely, creating a luscious, molten layer that coats the meat. The cheese should be fully integrated, not clumpy. The sauce will now have a silky, velvety texture that drapes over the buns.
- While the sauce is finishing, toast the four hamburger buns in a skillet or oven until golden brown. The buns should be warm and slightly crisp on the outside, providing a sturdy base for the rich sauce. A lightly buttered bun adds a subtle buttery note that complements the cheese.
- Spoon the cheesy sloppy joe mixture onto each bun, piling it high so every bite is packed with flavor. Top with an extra sprinkle of cheddar if you’re feeling indulgent. The final result is a towering sandwich that looks as impressive as it tastes.
- Let the assembled sandwiches rest for five minutes before serving. This short rest allows the cheese to set slightly, preventing a mess when you take the first bite. Serve immediately with a side of pickles or coleslaw for a crunchy contrast.
That's it—you did it. But hold on, I've got a few more tricks that'll take this to another level. The subtle tweaks below will elevate the dish from great to legendary.
Insider Tricks for Flawless Results
The Temperature Rule Nobody Follows
Many cooks let the skillet get too hot, causing the meat to brown unevenly and the sauce to scorch. Keep the heat at medium‑low once you add the tomato sauce, allowing the flavors to meld without burning. A gentle simmer is the secret to a silky, cohesive sauce that coats every inch of the bun.
Why Your Nose Knows Best
Before you taste, give the sauce a sniff. A strong, sweet aroma indicates that the sugars have caramelized, while a sharp, acidic scent signals that the tomatoes need more time. Trust your nose; it’s your most reliable flavor guide.
The 5‑Minute Rest That Changes Everything
After you plate the sandwiches, let them sit for five minutes. This brief pause allows the cheese to set into a slightly firmer, melt‑resistant layer that keeps the bun from getting soggy. I’ve seen folks skip this step, only to end up with a soggy mess that ruins the experience.
The Right Pan for the Job
A heavy‑bottomed skillet distributes heat evenly, preventing hot spots that can burn the sauce. If you don’t have a cast‑iron pan, a stainless steel or non‑stick skillet with a thick base works well. The right pan keeps the sauce from sticking and ensures a consistent texture.
The Final Cheese Touch
For an extra layer of gooeyness, sprinkle a few extra shreds of cheddar on top of each sandwich before serving. The cheese will melt into the sauce, creating a glossy, mouth‑watering finish that’s impossible to resist.
The Quick Clean‑Up Trick
Stain‑free cooking starts with a splash of vinegar in the sauce. A teaspoon of vinegar added during the simmering stage helps keep the pan from sticking and keeps the sauce bright in color. It’s a simple addition that pays off big time.
Creative Twists and Variations
This recipe is a playground. Here are some of my favorite ways to switch things up:
Mexican Sloppy Joe
Swap the cheddar for pepper jack, add a handful of corn kernels, and stir in a tablespoon of taco seasoning. The result is a spicy, cheesy sandwich that feels like a taco in a bun. Pair it with a side of guacamole for an extra layer of flavor.
BBQ Bacon Sloppy
Cook diced bacon until crispy, then add it to the meat mixture. Replace the tomato sauce with a smoky BBQ sauce and finish with a drizzle of honey. The bacon adds a salty crunch that contrasts beautifully with the sweet BBQ.
Mediterranean Twist
Add chopped sun‑dried tomatoes, kalamata olives, and a pinch of oregano to the sauce. Use feta cheese instead of cheddar for a tangy, salty finish. This version brings a bright, herby flavor that feels like a Mediterranean picnic.
Vegan Sloppy Joe
Replace the ground beef with crumbled tempeh or lentils, and use a plant‑based cheese. Add nutritional yeast for a cheesy flavor and a splash of soy sauce for depth. The result is a hearty, protein‑rich sandwich that satisfies even the most carnivorous taste buds.
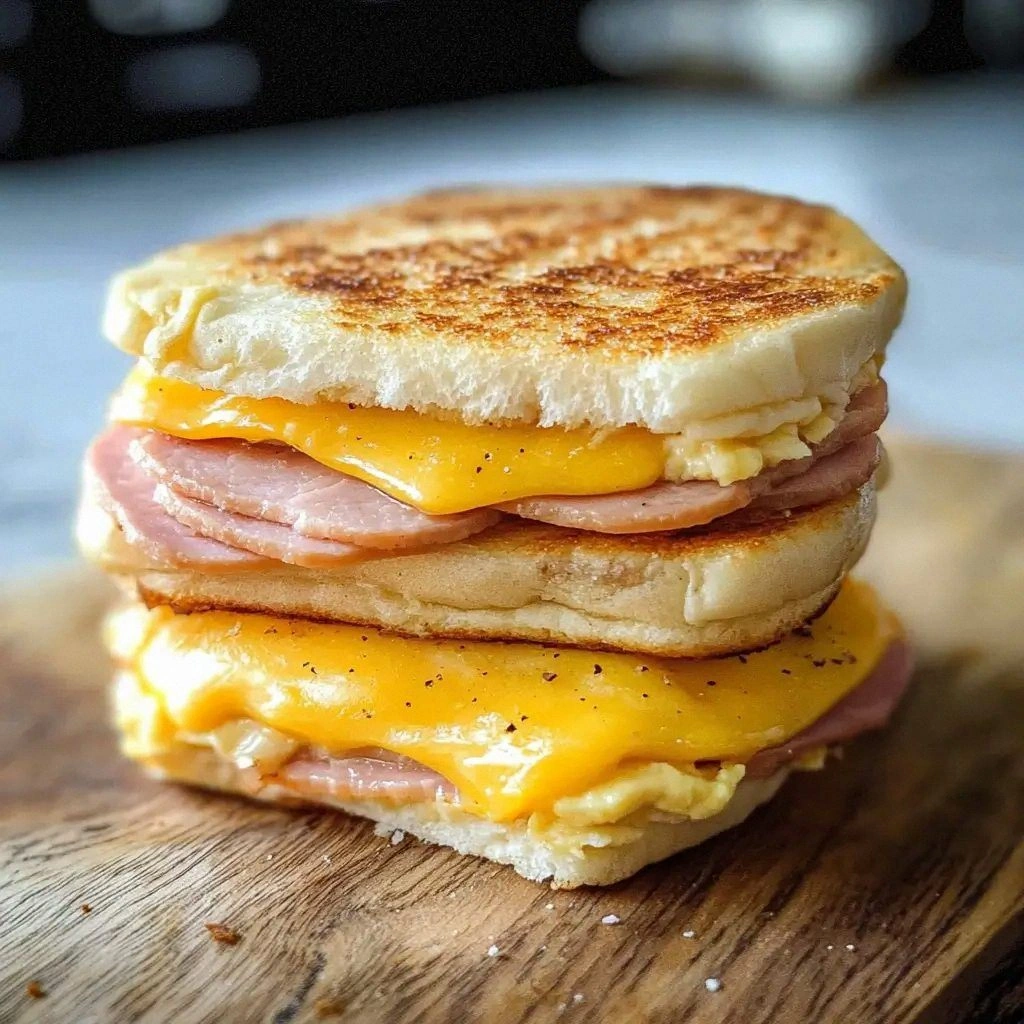
Breakfast Sloppy
Add a few scrambled eggs to the sauce before plating, and serve on a toasted English muffin. Sprinkle with chives for a fresh finish. This version turns a classic dinner into a breakfast powerhouse.
Spicy Sriracha Sloppy
Stir in a tablespoon of sriracha and a dash of lime juice for a bright, fiery kick. The lime adds acidity that balances the heat, while the sriracha gives the sauce a bold, smoky flavor. Perfect for those who love a little heat.
Storing and Bringing It Back to Life
Fridge Storage
Store the leftover sauce in an airtight container in the refrigerator for up to five days. The cheese will firm slightly, but a quick stir will restore its gooeyness. Keep the buns separate; toast them fresh for the best texture.
Freezer Friendly
Freeze the sauce in a freezer‑safe container for up to three months. When reheating, add a splash of water or broth to loosen the sauce. The cheese will melt beautifully once again, and the flavor will stay intact.
Best Reheating Method
Reheat the sauce over low heat, stirring frequently. Add a tiny splash of water before reheating—this steams the mixture back to perfection without drying it out. Serve immediately on freshly toasted buns for a comforting meal.