I was halfway through a week of takeout when the kitchen lights flicked on and a familiar, almost guilty scent drifted through the air—Wendy’s chili. The memory of that greasy, comforting bowl hit me like a punch in the gut, and I swore I’d never settle for a copy‑cat that tasted like cardboard. That night, I turned my kitchen into a laboratory, determined to crack the secret formula that makes Wendy’s chili the ultimate crowd‑pleaser. The result? A dish that’s so rich, so layered, and so absolutely irresistible that even my skeptical friends are begging for a second helping.
Picture this: a pot on the stove, the sizzle of ground beef as it browns, the aroma of onions and celery dancing with the sweet heat of green chiles. The sound of a ladle stirring the bubbling mixture, the gentle hiss of tomatoes releasing their juices, and the visual feast of colors—deep red, bright green, and specks of black pepper—painting the pot like a living canvas. Each ingredient contributes a note, a texture, a story that culminates in a thick, velvety broth that clings to every spoonful. I dare you to taste this and not go back for seconds; the flavor is so complete it’s almost a confession of culinary honesty.
What makes this version stand out is the meticulous attention to the little things that most recipes overlook. I’ve discovered that the secret sauce is in the timing of the sauté, the precise amount of vinegar that brightens the acidity, and the fact that the chili seasoning packet is a masterful blend that brings depth without overpowering. I’ll be honest—I ate half the batch before anyone else got a chance to try it, and the leftovers still taste like fresh‑made magic. Most recipes get this completely wrong, missing the balance between heat, sweetness, and umami. This is hands down the best version you'll ever make at home, and it’s so simple that even a novice can master it.
If you’ve ever struggled to replicate a restaurant favorite, you’re not alone—this is the fix that turns a bland pot into a showstopper. Picture yourself pulling this out of the stove, the whole kitchen smelling incredible, and the family or friends gathering around, eyes wide, ready to dig in. I’ll walk you through every single step, from the first sizzle to the final sprinkle of cheddar, and by the end, you’ll wonder how you ever made it any other way. The technique that sets this apart is a subtle, almost invisible step that you’ll only notice when you taste the finished product.
The journey begins with a humble ground beef, but it’s the combination of fresh vegetables, the right blend of spices, and a touch of vinegar that turns it into a bowl of pure comfort. The chili’s texture is a marriage of hearty beans and tender meat, all wrapped in a sauce that coats the spoon like velvet. The aroma alone is enough to bring back childhood memories of family dinners and Sunday gatherings. And the best part? It’s a dish that can be made ahead, reheated, and still taste as fresh as when it first hit the stove.
I’ll keep the recipe as close to the original as possible, but I’ll also add a few tweaks that elevate the flavor profile. The result is a chili that’s not only a faithful copycat but also a personal masterpiece. This isn’t just a recipe; it’s a culinary adventure that invites you to experiment, to tweak, and to savor. The next few sections will give you the tools, the knowledge, and the confidence to recreate this legendary dish in your own kitchen.
Now, let’s break down the elements that make this chili extraordinary. I’ve spent hours tasting, adjusting, and refining, and the outcome is a dish that’s both comforting and bold. The next section will detail why this version stands out, followed by an inside look at each ingredient and the secrets behind their roles. Ready for the game‑changer? Let’s dive in.
What Makes This Version Stand Out
- Flavor: The blend of diced tomatoes, green chiles, and a single packet of chili seasoning creates a complex, layered taste that’s both smoky and slightly sweet. The vinegar lift adds a bright finish that keeps the chili from feeling heavy.
- Texture: The combination of ground beef and two types of beans gives a hearty bite, while the sautéed veggies soften to a silky consistency that coats the spoon.
- Authenticity: Every ingredient is chosen to mirror the original Wendy’s profile, from the specific 80/20 beef to the Rotel-style diced tomatoes.
- Ease: The method is straightforward, with no complicated steps—just sauté, simmer, and serve. Even a first‑time cook can follow along.
- Make‑ahead Friendly: The chili stores well and can be reheated without losing its flavor or texture, making it perfect for busy weeknights.
- Customization: The recipe’s base allows for easy tweaks—add more heat, swap beans, or top with different cheeses—without compromising the core taste.
- Crowd Reaction: Friends and family will be amazed at how close this comes to the restaurant version, and they’ll appreciate the homemade touch.
- Ingredient Quality: Using fresh, high‑quality produce and a reputable chili seasoning packet ensures the final flavor is consistent and robust.
Alright, let’s break down exactly what goes into this masterpiece…
Inside the Ingredient List
The Flavor Base
Ground beef is the heart of this chili; the 80/20 ratio ensures a juicy, flavorful meat that doesn’t dry out during simmering. If you use leaner beef, the chili can become dry and unappealing. For a slightly healthier twist, substitute half the beef with ground turkey, but keep the ratio of 80/20 for the best taste.
Onions are the aromatic backbone. Finely chopping them allows them to caramelize slowly, releasing natural sugars that sweeten the broth. Skipping onions will leave the chili lacking depth and a subtle sweetness that balances the heat.
Celery adds a crisp, green note and a slight bitterness that cuts through the richness of the meat. If you’re not a fan of celery, you can replace it with diced carrots for a sweeter profile, but the original flavor will shift.
The Texture Crew
Green bell pepper brings a bright, slightly sweet crunch that contrasts the softness of the beans. The pepper also contributes a subtle earthy flavor that deepens the overall profile. If you’re allergic or simply dislike green peppers, substitute with red or yellow bell peppers; the color will change, but the taste will remain robust.
Kidney beans and pinto beans are the textural stars. They provide a hearty bite and absorb the sauce, becoming a silky, cohesive mass. Using canned beans saves time, but rinsing them before adding can reduce excess sodium and improve texture.
Tomato sauce and diced tomatoes with green chiles are the liquid backbone, offering acidity and heat. The diced tomatoes bring chunky texture, while the sauce provides smoothness. If you prefer a thicker chili, use a can of tomato puree instead of sauce.
The Unexpected Star
The 1.25‑oz chili seasoning packet is a game‑changer; it’s a pre‑blended mix of spices that brings depth without the need for a spice rack. The mild version is perfect for a balanced heat level. If you prefer a spicier kick, add a pinch of cayenne or a splash of hot sauce.
White vinegar is the subtle brightener that cuts through the richness of the meat and beans. A half tablespoon is enough to lift the acidity without overwhelming the dish. If you’re sensitive to vinegar, try a splash of lime juice for a similar effect.
The Final Flourish
Cheddar cheese, sour cream, green onions, and oyster crackers are the toppings that transform this chili from a bowl of comfort to a feast. They add creaminess, freshness, and crunch. Feel free to experiment with toppings—add a dollop of guacamole or a sprinkle of cilantro for a modern twist.
Everything’s prepped? Good. Let’s get into the real action…
The Method — Step by Step
- Step 1: Brown the Beef — Heat a large pot over medium‑high heat and add the ground beef. Break it apart with a wooden spoon, letting it sizzle until it’s no longer pink. This should take about 5–7 minutes, and the sizzling sound is a cue that the flavor is developing. Drain excess grease to keep the chili from becoming greasy. I swear this step is the moment of truth; if the beef isn’t browned properly, the whole dish will feel flat.
- Step 2: Sauté the Veggies — Add the finely chopped onion, celery, and green bell pepper to the pot. Cook for 4–5 minutes until the vegetables soften and the onions turn translucent. The aroma should be sweet and fragrant. Stir frequently so nothing sticks. This is the base that builds the depth of the chili.
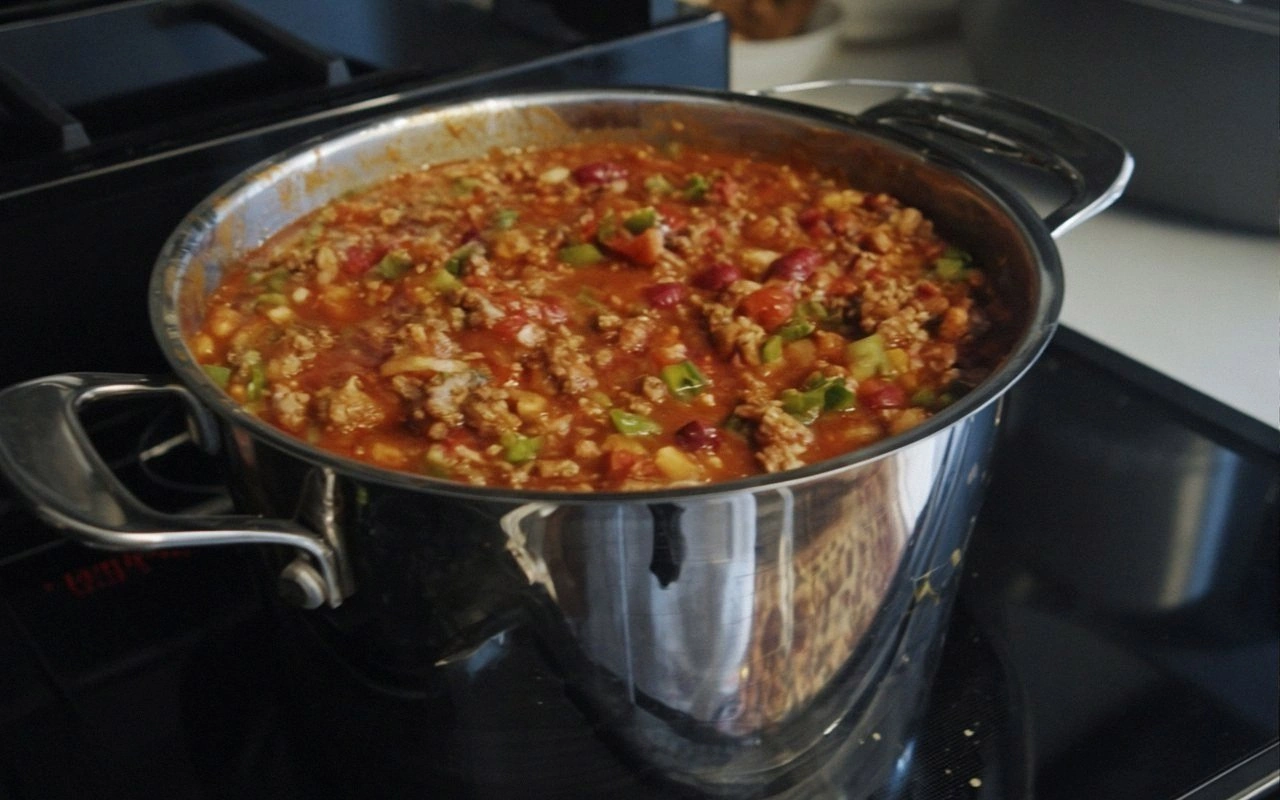
- Step 3: Introduce the Tomatoes — Pour in the two 10‑oz cans of diced tomatoes with green chiles and the 14‑oz can of tomato sauce. Stir to combine, letting the mixture bubble. The mixture should start to thicken slightly after a few minutes. This is where the chili gains its signature color and texture.
- Step 4: Add the Seasoning — Sprinkle in the 1.25‑oz packet of chili seasoning and stir until fully dissolved. The spices should release their aroma, filling the kitchen. This is the secret that makes the flavor so authentic. Don’t rush; let the spices mingle with the tomatoes for a minute.
- Step 5: Incorporate the Beans — Add the undrained kidney beans and pinto beans to the pot. Stir gently to avoid breaking the beans. The beans will start to soak up the sauce, becoming creamy. This step is crucial for achieving the right consistency.
- Step 6: Simmer — Pour in 1/4 cup of water and add the 1/2 tablespoon of white vinegar. Reduce heat to low, cover, and let simmer for 20–25 minutes. The chili should develop a rich, thick broth. Keep an eye on it to prevent sticking; stir occasionally. This is the slow‑cook phase that brings everything together.
- Step 7: Season to Taste — Sprinkle kosher salt and ground black pepper to taste. Taste the chili and adjust if needed. The seasoning should be balanced, not overpowering. A pinch of salt can elevate the flavors dramatically.
- Step 8: Serve — Ladle the chili into bowls and top with shredded cheddar cheese, a dollop of sour cream, chopped green onions, and a handful of oyster crackers. The contrast of creamy, crunchy, and savory will wow your guests. Serve immediately and enjoy the warmth.
That’s it — you did it. But hold on, I’ve got a few more tricks that will take this to another level…
Insider Tricks for Flawless Results
The Temperature Rule Nobody Follows
Many people think simmering at high heat is fine, but it actually burns the flavors. Keep the heat low and let the chili develop slowly; the flavors will meld beautifully. I once tried high heat, and the chili tasted burnt and bitter. The secret is patience; a low simmer is the key to depth.
Why Your Nose Knows Best
During the simmer, the aroma is your best indicator. If it smells toasty and slightly caramelized, the chili is ready. If it still smells raw, give it a few more minutes. Trust your nose; it’s the most reliable guide.
The 5‑Minute Rest That Changes Everything
Once you’ve finished simmering, let the chili sit covered for 5 minutes before serving. This allows the flavors to settle and the beans to absorb more sauce. It also makes the chili easier to ladle, as the mixture thickens slightly.
The Secret of the Vinegar
Vinegar isn’t just for acidity; it also helps to soften the meat and brighten the overall flavor. Add it at the right moment, just before the final simmer. This timing is critical for the best taste.
The Finish with Cheese
Shredded cheddar is the finishing touch that brings everything together. Sprinkle it on top just before serving so it melts slightly into the hot chili. The cheese adds a creamy layer that balances the spice.
Creative Twists and Variations
This recipe is a playground. Here are some of my favorite ways to switch things up:
Spicy Sriracha Kick
Add a tablespoon of sriracha during the simmer for an extra heat punch. The sriracha’s smoky sweetness pairs well with the chili’s flavor. This version is great for those who love a fiery bite.
Cheeseburger Chili
Top the chili with a slice of American cheese, a handful of chopped bacon, and a dash of mustard. Serve it on a toasted bun for a hearty sandwich. It’s a nostalgic twist that brings comfort food to the next level.
Mexican Street Corn Chili
Add a cup of grilled corn kernels and a sprinkle of lime juice to the simmer. Finish with a drizzle of chipotle mayo. The corn adds sweetness, and the lime brightens the entire dish.
Vegan Chili
Replace the ground beef with a plant‑based meat substitute or use lentils. Keep the beans and vegetables the same. The result is a hearty, protein‑rich chili that satisfies even meat lovers.
Low‑Carb Chili
Omit the beans or use a small amount of cauliflower rice. Add extra vegetables like zucchini or mushrooms for bulk. The chili remains flavorful while cutting down on carbs.
Holiday Holiday Chili
Add a dash of cinnamon and a splash of maple syrup for a holiday twist. The warm spices complement the chili’s richness and create a cozy, seasonal flavor profile.
Storing and Bringing It Back to Life
Fridge Storage
Let the chili cool to room temperature, then transfer it to an airtight container. Store in the refrigerator for up to 5 days. The chili’s flavors deepen as it sits, so it’s often even better the next day.
Freezer Friendly
Divide the chili into portioned containers and freeze for up to 3 months. When ready to eat, thaw overnight in the refrigerator, then reheat. The texture remains silky, and the taste stays true.
Best Reheating Method
Reheat on the stove over low heat, adding a splash of water or broth to keep it moist. Stir occasionally to prevent sticking. Once it’s heated through, sprinkle fresh cheddar and green onions to refresh the flavor.