It started with a kitchen catastrophe that I swear is still replaying in my head like a bad dream. I was halfway through a batch of homemade brownies, the batter thickening, the aroma filling the room, when I realized I had forgotten to add the baking soda. The result? Dense, cakey brownies that tasted like a chocolatey sponge cake with a hint of bitterness. I stared at the oven door, feeling the heat radiate through my apron, and thought, “What if I could turn that disaster into something spectacular?” That thought turned into a dare: I’d create a brownie cookie that would be the ultimate chocolate treat, crisp on the outside, fudgy inside, with a subtle crunch that would make anyone question their loyalty to plain chocolate bars. I dare you to taste this and not go back for seconds. I’m not kidding—once you bite, you’ll be hooked.
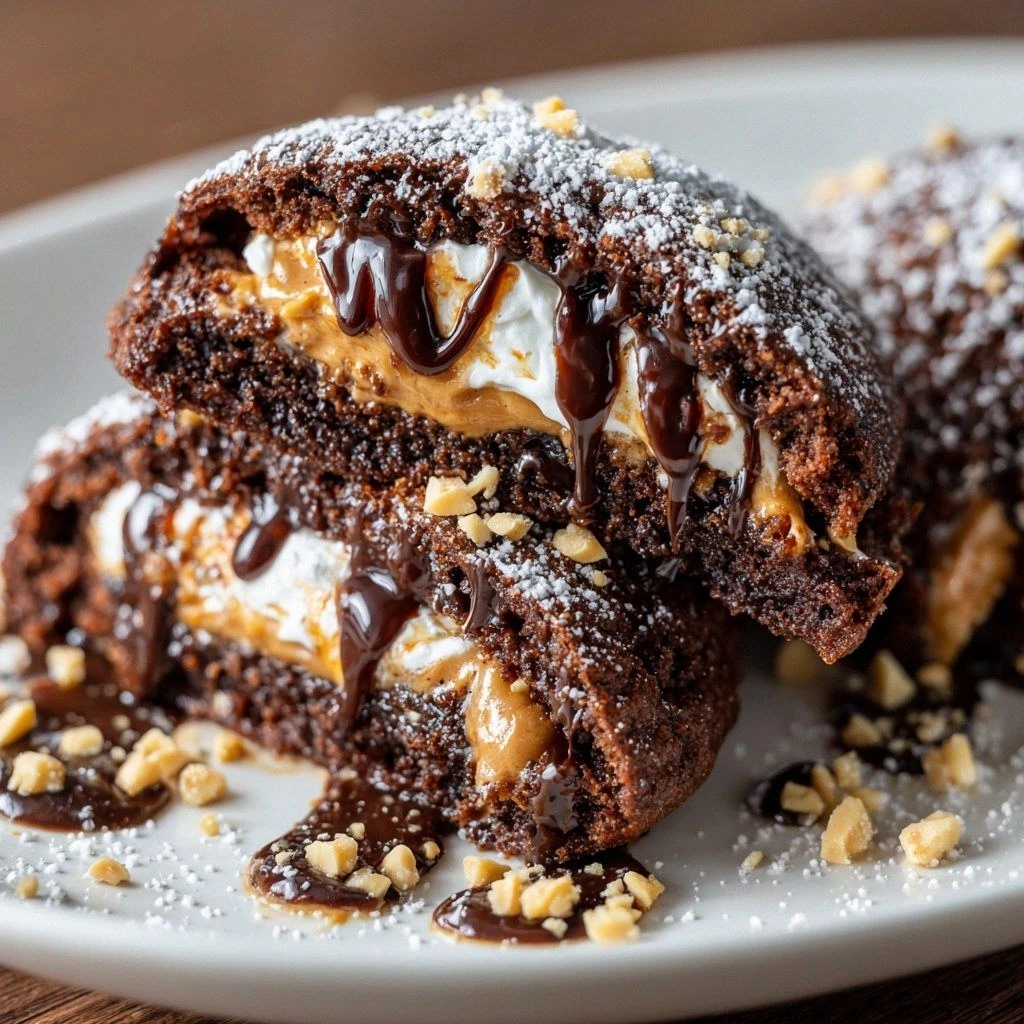
Picture yourself pulling this out of the oven, the whole kitchen smelling incredible, the sound of a gentle crackle as the edges crisp just enough to give that satisfying snap. The first bite is a burst of rich chocolate, followed by a buttery, melt‑in‑your‑mouth texture that feels like a silky ribbon of decadence. The crumb is slightly chewy, but the edges are perfectly crisp, like a fine crust that shatters like thin ice. It’s the kind of cookie that makes you pause, smile, and say, “This is hands down the best version you’ll ever make at home.” If you’ve ever struggled with the texture of chocolate cookies, you’re not alone—this is the fix you’ve been waiting for. Okay, ready for the game‑changer?
I’ll be honest—my first batch was a mess. I over‑mixed the batter, and the cookies spread too thin, then I tried to fix it by adding more flour, which made them dry. After a couple of iterations, I discovered the secret sauce: a precise balance of wet and dry ingredients, a touch of sea salt to cut the sweetness, and a little extra butter to keep them moist. I also learned that the type of chocolate chips matters—dark chocolate with a high cacao percentage gives a richer flavor profile and a more satisfying bite. Every tweak was a lesson, a small victory, and a step toward the cookie that would become my new obsession.
The moment I tasted the first perfect cookie, I knew I had to share this with you. The recipe is simple, but the result is a gourmet experience that will elevate your cookie game to the next level. I’ve packed every detail into this post— from ingredient selection to baking tips—so you can replicate the same mouth‑watering experience at home. Let me walk you through every single step—by the end, you’ll wonder how you ever made it any other way.
What Makes This Version Stand Out
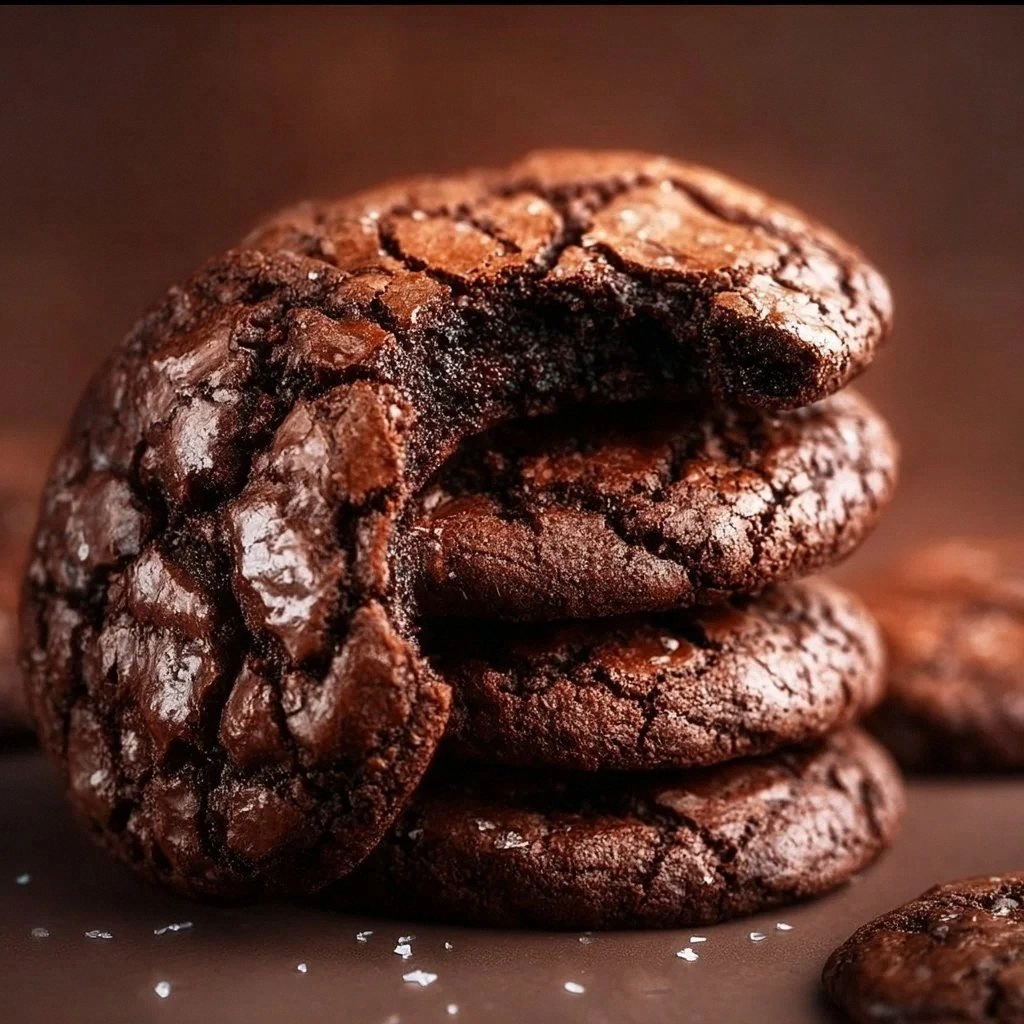
- Flavor Depth: A blend of cocoa, dark chocolate chips, and a hint of sea salt creates a complex chocolate profile that lingers on the palate.
- Texture Contrast: The cookie features a crisp, golden edge that gives way to a fudgy, chewy center, providing a satisfying bite.
- Ingredient Quality: Using high‑grade chocolate chips and real butter elevates the taste beyond store‑bought cookies.
- Balanced Sweetness: Combining granulated sugar with brown sugar gives a subtle caramel undertone without overwhelming sweetness.
- Easy Make‑Ahead: The cookies can be prepared ahead, frozen, and baked fresh when needed, keeping the flavor intact.
- Versatility: The base recipe is a canvas for creative variations—nuts, dried fruit, or a swirl of caramel.
- Time Efficiency: Prep time is only 15 minutes, and the baking process is a quick 30 minutes.
- Crowd‑Pleaser: Whether you’re hosting a party or just treating yourself, these cookies get rave reviews.
Alright, let’s break down exactly what goes into this masterpiece…
Inside the Ingredient List
The Flavor Base
The foundation of our cookies starts with a balanced blend of dry ingredients. All‑purpose flour provides structure, while unsweetened cocoa powder delivers that deep chocolate flavor. Baking soda and salt are essential for leavening and flavor balance. If you prefer a more intense cocoa taste, consider swapping half the flour for cocoa powder, but be careful—too much cocoa can make the batter overly dry.
The Texture Crew
Butter is the unsung hero that brings moisture and richness. Creaming it with sugars creates tiny air pockets that give the cookies their lightness. Granulated sugar adds a clean sweetness, whereas brown sugar brings caramel notes and a slight chewiness. Eggs act as binders, holding everything together while contributing to the cookie’s chewy interior.
The Unexpected Star
Dark chocolate chips are the star of the show, providing bursts of intense chocolate flavor and a satisfying bite. They melt just enough during baking to create pockets of gooeyness without turning the cookies into a chocolate mud. If you’re vegan or lactose‑free, look for dark chocolate chips labeled “vegan” or “dairy‑free.”
The Final Flourish
A dash of vanilla extract amplifies the chocolate flavor and adds a subtle aroma. Optional chopped walnuts or pecans introduce a nutty crunch that complements the cookie’s texture. A pinch of sea salt on top before baking enhances the overall flavor profile, cutting through the sweetness and bringing out the chocolate’s depth.
Everything’s prepped? Good. Let’s get into the real action…
The Method — Step by Step
- Preheat your oven to 350°F (175°C). Line a baking sheet with parchment paper or a silicone mat. The temperature is key—too high and the cookies will burn; too low and they won’t set properly. This step ensures a consistent bake and a beautiful golden edge. Watch out: If your oven runs hot, rotate the sheet halfway through baking to avoid uneven browning.
- Combine the dry ingredients. In a bowl, whisk together the flour, cocoa powder, baking soda, and salt. This creates an even distribution of leavening agents and prevents clumps. A smooth dry mix will help the batter rise evenly and prevent pockets of flour.
- Cream butter and sugars. In a separate bowl, beat the softened butter with granulated and brown sugars until light and fluffy—about 2–3 minutes. This process incorporates air, giving the cookies a lighter texture. The sugars will dissolve into the butter, creating a smooth base for the wet ingredients.
-
Add the eggs and vanilla. Beat in the eggs one at a time, ensuring each is fully incorporated before adding the next. Stir in vanilla extract. The eggs bind the batter, while vanilla enhances the chocolate flavor. Kitchen Hack: If you’re short on time, you can whisk the eggs with the sugar mixture to save a few minutes.
- Combine wet and dry mixtures. Gradually fold the dry ingredients into the wet mixture, stirring until just combined. Overmixing can develop gluten, resulting in tough cookies. The batter should be thick yet pourable. At this point, the batter will have a rich chocolate aroma—proof that you’re on the right track.
- Fold in chocolate chips and nuts. Gently stir in the dark chocolate chips and walnuts (if using). The chips should be evenly distributed so each bite contains a chocolate burst. The nuts add a satisfying crunch that contrasts with the chewy center.
- Drop spoonfuls onto the sheet. Use a tablespoon or a small cookie scoop to place dough onto the prepared sheet, spacing them about 2 inches apart. The dough should hold its shape but not spread too much. This spacing allows for even baking and crisp edges.
- Bake until golden. Place in the preheated oven and bake for 12–14 minutes. The cookies should look set with a slightly glossy top. The edges should be firm, but the center will still feel soft. If you prefer a crisper cookie, bake for an additional 1–2 minutes, but watch closely to avoid burning.
- Cool on the sheet. Let the cookies rest on the baking sheet for 5 minutes. This step allows the interior to set, preventing them from breaking when transferred to a rack. The cookies will appear slightly softer during this time, but they will firm up as they cool.
- Transfer to a rack. Move the cookies to a wire rack to cool completely. Sprinkle a pinch of sea salt over the tops while still warm for a subtle salty finish. Once cooled, store them in an airtight container at room temperature for up to a week.
That’s it—you did it. But hold on, I’ve got a few more tricks that will take this to another level…
Insider Tricks for Flawless Results
The Temperature Rule Nobody Follows
Many bakers bake at 375°F, thinking it will speed up the process. However, 350°F is the sweet spot for these cookies. It allows the edges to set while keeping the center moist. If you’re using a convection oven, lower the temperature by 25°F to avoid over‑browning. This subtle tweak can dramatically improve the texture.
Why Your Nose Knows Best
The aroma of a cookie baking is a reliable indicator of doneness. When the smell turns from sweet to a faint nutty, almost burnt scent, the cookies are ready. Trust your nose—it’s a better judge than the timer. This is especially useful if you’re baking a large batch and your oven’s temperature may vary.
The 5‑Minute Rest That Changes Everything
Letting the cookies sit on the sheet for five minutes after baking is often overlooked. During this rest, the interior sets and the cookies stop spreading. If you transfer them too early, they may crumble or break. I once tried skipping this step and the cookies were fragile. Don’t make that mistake.
The Secret to Even Thickness
If your cookies are uneven in thickness, the batter may be too thick or too thin. Aim for a dough consistency that resembles thick peanut butter. If it’s too thick, add a tablespoon of milk; if too thin, add a tablespoon of flour. This small adjustment ensures uniform baking and a consistent bite.
The Perfect Crumb
A chewy crumb is achieved by balancing the ratio of brown to granulated sugar. Brown sugar adds moisture and caramel flavor, while granulated sugar keeps the cookie from becoming too dense. Adjusting this ratio can tailor the cookie to your taste—more brown sugar for chewiness, more granulated for a crisp edge.
Creative Twists and Variations
This recipe is a playground. Here are some of my favorite ways to switch things up:
Salted Caramel Swirl
Fold in a handful of caramel bits and a dash of sea salt. The caramel adds a sweet, buttery contrast while the salt enhances the chocolate depth. Great for a decadent dessert.
Espresso Infusion
Add a teaspoon of instant espresso powder to the dry mix. The coffee flavor cuts through the sweetness and brings out a richer chocolate note. Perfect for coffee lovers.
Peanut Butter Crunch
Swirl in a tablespoon of creamy peanut butter before baking. The peanut butter creates pockets of creamy texture and a nutty aroma. Pair with chopped peanuts for extra crunch.
Minty Chocolate Chip
Add a few drops of peppermint extract and a handful of white chocolate chips. The mint gives a refreshing lift, while the white chocolate balances the bitterness. Ideal for holiday treats.
Vegan Version
Replace butter with coconut oil, use flaxseed or chia seed “egg” substitutes, and choose dairy‑free chocolate chips. The result is a vegan cookie that still delivers that rich chocolate flavor and chewy center.
Storing and Bringing It Back to Life
Fridge Storage
Store cookies in an airtight container at room temperature for up to 5 days. The airtight seal preserves moisture and prevents the cookies from drying out. If you notice any staleness, a quick refresh can bring them back to life.
Freezer Friendly
Place the cooled cookies in a freezer‑safe bag, removing as much air as possible. They can be stored for up to 3 months. When you’re ready to eat, let them thaw at room temperature for 30 minutes before enjoying.
Best Reheating Method
To revive frozen or stale cookies, preheat your oven to 300°F (150°C). Place the cookies on a parchment‑lined sheet and bake for 8–10 minutes. Add a tiny splash of water to the batter before baking if you’re preparing fresh cookies—this steams them back to a moist, chewy center.