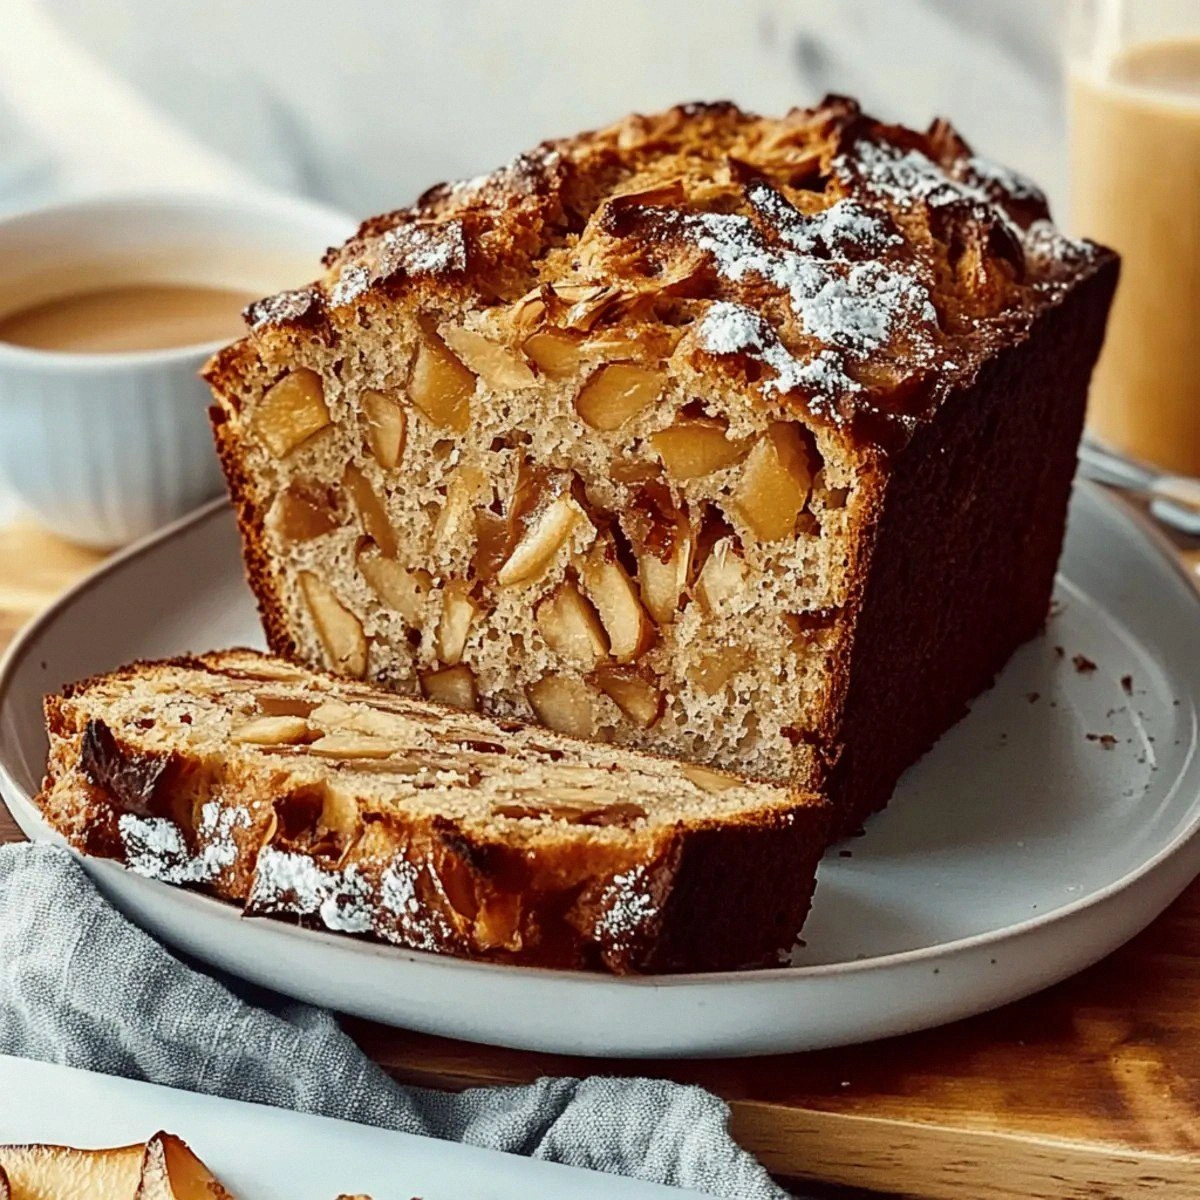
I burned my first three loaves of apple bread so badly that the smoke alarm became my unofficial kitchen timer. There I was, standing in my tiny apartment at 2 AM, waving a dish towel at the ceiling like some deranged maestro conducting a symphony of culinary failure. The fourth attempt? Let's just say it was so dense I could have used it as a doorstop. But here's the thing about stubborn food lovers — we don't give up when we taste greatness in our minds. We keep going, tweaking, tasting, and occasionally cursing until we crack the code. That fifth loaf changed everything. The apples caramelized into these jammy pockets of autumn magic, the crumb was tender enough to make a cloud jealous, and the smell — oh, that smell — wrapped around me like my grandmother's hug after a long day.
Picture this: It's a Saturday morning in October. The kind where the air has that perfect crisp bite that makes you want to live in sweaters forever. You're standing at your kitchen counter, flour dusting your fingertips like early snow. The oven's preheating, and there's a bowl of apples that have been roasted into this concentrated essence of fall — they look like little jewels, glistening with their own reduced sugars. This isn't just another quick bread recipe that tastes like disappointment and dry crumbs. This is the one that'll make your neighbors knock on your door asking what bakery just opened in your kitchen. The secret? We're not just tossing in raw apples and hoping for the best. We're roasting them first, concentrating their flavor until they're basically apple candy.
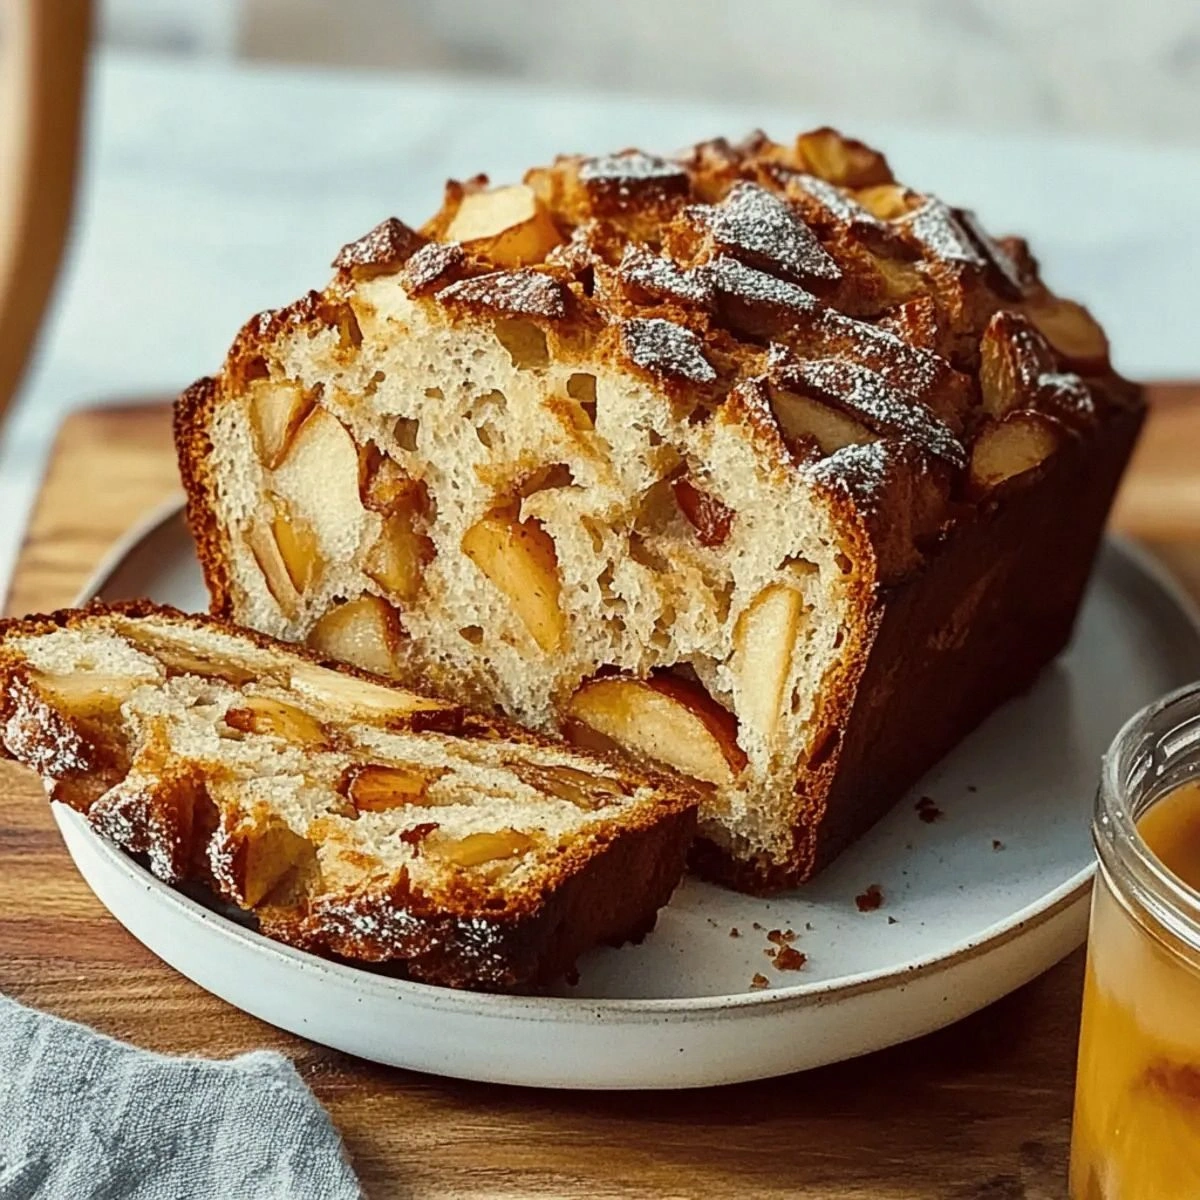
I've tested this recipe seventeen times over the past two months. My family staged an intervention when they found me roasting apples at midnight again, but I don't regret a single sleepless night. Because what emerged from all that experimentation is nothing short of miraculous — a bread so moist it stays tender for days, packed with such intense apple flavor that you'll swear you're biting into autumn itself. The edges get these crispy, caramelized bits that shatter like thin ice under your fork, while the inside stays impossibly soft and studded with pockets of roasted apple that melt on your tongue.
Most apple bread recipes get it completely wrong. They treat apples like afterthoughts, folding in plain chunks that steam into rubbery disappointment. Others drown the whole thing in so much spice you might as well be eating potpourri. But here's what actually works: we roast the apples first until they're concentrated and jammy, we use just enough cinnamon to complement rather than dominate, and we create a texture that's somehow both substantial and cloud-light. Stay with me here — this is worth it. Let me walk you through every single step — by the end, you'll wonder how you ever made it any other way.
What Makes This Version Stand Out
Caramelized Apple Magic: While other recipes toss in raw fruit that waters down the batter, we roast apples until they're concentrated into nature's own apple jam. This creates pockets of intense flavor that burst in your mouth like little apple bombs, transforming every bite into a celebration of fall.
Texture That Defies Physics: The crumb manages to be both substantial and impossibly tender, with crispy edges that provide the perfect contrast to the moist interior. It's like someone figured out how to make bread feel like it was kissed by clouds while still having enough heft to satisfy.
One-Bowl Wonder: Despite tasting like you spent hours slaving away, this entire masterpiece comes together in one bowl. No separating eggs, no creaming butter and sugar until your arm falls off, no complicated techniques that require a culinary degree.
The Stay-Fresh Champion: Thanks to the roasted apples and a secret ingredient combo, this bread stays moist for up to five days at room temperature. Most quick breads turn into sawdust by day two, but this one actually tastes better the next day as the flavors meld and deepen.
Crowd-Pleasing Powerhouse: I've watched picky toddlers, health-food skeptics, and that one uncle who claims to hate everything sweet all go back for seconds. It's not too sweet, not too spicy, not too anything — it hits that perfect balance that makes everyone happy.
Make-Ahead Marvel: The roasted apples can be made up to a week ahead and stored in the fridge. The batter comes together in minutes when you're ready. This means you can have fresh, warm apple bread on a Tuesday morning without any morning-of prep.
Ingredient Flexibility: Out of butter? Use oil. Only have pears? They work beautifully. Want to go gluten-free? I've got you covered with a simple swap. This recipe bends without breaking, making it your new go-to for using up whatever fruit is languishing in your crisper drawer.
The Smell That Sells Houses: Real estate agents should bake this during open houses. The aroma of roasting apples with cinnamon and butter creates such an intoxicating atmosphere that people forget to notice the small closets. My neighbor once offered to buy my oven after catching a whiff.
Alright, let's break down exactly what goes into this masterpiece...
Inside the Ingredient List
The Flavor Foundation
All-purpose flour forms the backbone of our bread, but not all flours are created equal. I tested this with everything from cake flour (too delicate) to bread flour (too chewy) and landed on good old all-purpose as the Goldilocks choice. It provides enough structure to support those jammy apple pockets while still keeping things tender. If you're in a pinch, you can swap in up to half whole wheat flour for a nuttier flavor, but go beyond that and you'll start tasting healthy in a way that nobody wants from their comfort baking.
Granulated sugar does more than just sweeten — it creates tenderness by interfering with gluten development and helps create that gorgeous golden-brown crust. I tried brown sugar versions, but found they competed too much with the roasted apple flavor. White sugar steps back and lets the fruit be the star while still doing its job behind the scenes. Plus, it caramelizes better, giving you those irresistible crispy edges.
The Spice Symphony
Cinnamon is the obvious choice, but here's where most recipes go wrong — they dump in a tablespoon of whatever's been sitting in their pantry since 2019. Fresh cinnamon matters, and the amount matters even more. One tablespoon hits that perfect note where you know it's there, but it doesn't punch you in the face with potpourri vibes. I prefer Ceylon cinnamon for its warmer, more complex flavor, but regular cassia works if that's what you've got.
Nutmeg is the secret weapon that makes people ask "what's in this?" in the best way. Just half a teaspoon adds this mysterious warmth that makes the apple flavor taste more apple-y. Skip it and the bread still works, but add it and suddenly you're that person whose baking everyone talks about. Fresh grated is incredible if you're feeling fancy, but pre-ground gets the job done.
The Texture Team
Baking powder might seem boring, but it's doing the heavy lifting here. We're using a full tablespoon because those roasted apples are heavy, and we need serious lift to keep the bread from becoming apple-flavored concrete. Make sure yours is fresh — if it's been open longer than six months, treat yourself to a new can. Old baking powder is the silent killer of fluffy baked goods everywhere.
Unsalted butter gives us control over the salt level and creates that rich, tender crumb that makes people close their eyes when they take a bite. It needs to be softened but still cool — not melted, not fridge-cold. Think playdough texture. In a hurry? Cut it into small cubes and it'll soften in about ten minutes. I've also tested this with neutral oil in a pinch, and while it's not quite as rich, it still produces a damn good loaf.
The Unexpected Star
Roasted apples are where the magic happens. We're not just tossing in raw fruit here — we're transforming them into concentrated flavor bombs that'll make you wonder why you've been settling for watery apple bread your whole life. Any apple works, but a mix of sweet and tart gives the best results. Honeycrisp for sweetness, Granny Smith for tang, maybe a Fuji for complexity. Roast them until they're shrunken and jammy, about 45 minutes at 375°F. Your kitchen will smell like fall exploded, and you'll be tempted to eat them all straight off the pan. Don't. Or do, and just roast more. I won't judge.
Everything's prepped? Good. Let's get into the real action...
The Method — Step by Step
- Start by roasting your apples because this is where the flavor foundation gets built. Dice about four medium apples into half-inch pieces — don't stress about perfect cubes, rustic is charming here. Toss them on a parchment-lined baking sheet and into a 375°F oven they go for 45 minutes. You're looking for them to shrink down to about half their original volume and turn this gorgeous caramelized brown. Your kitchen will start smelling like an apple cider donut factory, and this is when family members mysteriously appear asking what you're making. Stir them once halfway through, but mostly let them do their thing while you contemplate how you've lived this long without knowing about roasted apples.
- While those apples are transforming into autumn gold, get your dry ingredients friendly with each other in a large bowl. Whisk together the flour, sugar, baking powder, cinnamon, nutmeg, and salt. Really whisk it — you want everything distributed evenly because once the wet ingredients hit, there's no going back. This is also when you can admire how the cinnamon creates these beautiful swirls through the flour, like edible art. Take a moment to appreciate that you're about to turn this plain-looking mixture into something magical.
- Now for the wet ingredients — crack those eggs into a separate bowl and beat them like they owe you money. You want them light and foamy, which incorporates air that'll help give us lift. Melt your butter and let it cool slightly; we're going for warm bath temperature, not molten lava. If you pour hot butter over eggs, you'll get scrambled eggs in your bread, and nobody wants that breakfast confusion.
- Here's where it gets fun — make a well in your dry ingredients and pour in the beaten eggs and melted butter. Start folding everything together with a spatula, but here's the key: stop when you still see streaks of flour. Overmixing is the enemy of tender quick bread, and we're going to add more moisture with those roasted apples. The batter should look like a shaggy, lumpy mess at this stage, and that's exactly what we want. If you're looking at it thinking "this can't be right," you're on the right track.
- Fold in those gorgeous roasted apples, along with any syrupy juices that collected on the pan. This is pure magic happening right here — those concentrated apple flavors are about to distribute throughout every bite. Be gentle but thorough; you want those apple pieces evenly distributed without overworking the batter. Some will break down and create these beautiful marbling effects, others will stay in chunks for textural surprise. The batter will loosen up as the apple juices incorporate, transforming from stiff to spoonable.
- Prepare your pan like you're tucking it in for a cozy nap. Butter and flour a 9x5-inch loaf pan, getting into all the corners — nothing kills the mood like a beautiful loaf that won't come out. Alternatively, line it with parchment paper, leaving wings to lift the bread out later. Pour in your batter and smooth the top, but don't obsess about making it perfect. Those little swirls and bumps create character and catch the heat for extra caramelization.
- Into a 350°F oven it goes for 55-65 minutes. Don't even think about opening that door for the first 45 minutes — we're building steam and structure in there. Around the 50-minute mark, start checking for doneness. A toothpick should come out with just a few moist crumbs, not wet batter. The top should be deeply golden brown and might have a few cracks running across it like a beautiful, edible topographical map. If the top is browning too quickly, tent it with foil for the last 15 minutes.
- The hardest part: waiting. Let this beauty cool in the pan for 15 minutes, then turn it out onto a wire rack. It needs at least an hour to cool completely, but I'll be honest — I've never made it that long. Warm apple bread with butter melting into all those nooks and crannies is one of life's great pleasures. If you can wait until the next day, the flavors meld into something even more incredible, and the texture becomes somehow even more tender.
That's it — you did it. But hold on, I've got a few more tricks that'll take this to another level...
Insider Tricks for Flawless Results
The Temperature Rule Nobody Follows
Here's the thing that separates good bakers from great ones: ingredient temperature matters more than almost anything else. Cold eggs won't incorporate properly, leading to a streaky batter. Hot melted butter will cook your eggs on contact, creating little scrambled bits. Everything should be at room temperature except the butter, which should be warm but not hot. I leave my eggs on the counter for 30 minutes before baking, and if I'm in a hurry, I'll place them in warm (not hot) water for five minutes. Your future self will thank you when you slice into a loaf with perfect, even texture.
Why Your Nose Knows Best
Don't just rely on the timer — your nose is your most reliable baking tool. When this bread is about five minutes from done, your kitchen will fill with this incredible aroma that's deeper and more complex than just apples and cinnamon. It's like fall distilled into a smell, and when you catch that first whiff, start checking for doneness. This is especially crucial if your oven runs hot or cold, because aroma doesn't lie. I've saved more potential disasters by trusting my nose than any thermometer or timer.
The 5-Minute Rest That Changes Everything
After you take the bread out of the oven, resist every instinct to immediately turn it out of the pan. Those five minutes of patience allow the structure to set, preventing the dreaded collapse. But here's the genius part — during this time, the residual heat continues cooking the center while the edges start to pull away from the pan slightly. It's like a mini steam treatment that ensures every slice is perfect. I set a timer because I'm impatient, and those five minutes feel like an eternity, but they're the difference between professional-looking results and a sad, sunken loaf.
The Secret Slice Test
Forget everything you know about the toothpick test for this bread. Because of those jammy roasted apples, a toothpick might come out looking wet even when the bread is perfectly done. Instead, gently press the top — it should spring back slowly, leaving just a slight indentation. The edges should be pulling away from the pan, and when you peek at the sides, they should look set and slightly darker than the center. Trust these visual cues more than any toothpick, because nobody likes dry apple bread, and the carryover cooking will finish the job perfectly.
Creative Twists and Variations
This recipe is a playground. Here are some of my favorite ways to switch things up:
The Pear Honey Version
Swap half the apples for ripe pears and replace the sugar with honey for a more sophisticated flavor profile. The pears roast into this buttery sweetness that pairs beautifully with honey's floral notes. Add a pinch of cardamom instead of nutmeg for a Scandinavian vibe that'll make you want to wear chunky sweaters and read murder mysteries. The honey creates an even moister crumb that stays tender for an extra day, not that it'll last that long.
The Tropical Escape
Replace half the apples with diced pineapple, swap cinnamon for ginger, and add some toasted coconut on top. It sounds crazy until you try it — the roasted pineapple creates these candy-like bits that transport you straight to a beach somewhere. The ginger adds warmth without screaming "pumpkin spice," and toasted coconut on top gets crispy and caramelized. Close your eyes when you eat it and you can almost hear waves crashing.
The Chocolate Swirl Dream
Keep everything the same but swirl in some dark chocolate chunks before baking. Not chips — chunks, because we want those melty pockets of chocolate that create drama in every slice. The bitterness of good dark chocolate against the sweet roasted apples is a combination that makes grown adults make involuntary happy sounds. Use chocolate that's at least 70% cacao so it doesn't get lost in the sweetness.
The Breakfast Makeover
Add a cup of old-fashioned oats and swap the butter for browned butter to create a heartier version that's basically breakfast disguised as cake. The oats absorb some of the apple juices and create this amazing texture that's part bread, part coffee cake. Brown the butter until it smells nutty and looks like liquid gold — this adds depth that makes people ask if you used some fancy European butter. This version toasts beautifully and makes the best French toast you've ever had.
The Savory Surprise
Cut the sugar in half, add some sharp cheddar to the batter, and throw in some fresh rosemary. I know, I know — savory apple bread sounds wrong until you try it. The cheese creates these salty, melty pockets, and rosemary's piney notes make the apples taste more apple-y somehow. Serve this warm with butter and honey for a sophisticated brunch option that'll make you look like you went to culinary school.
The Gluten-Free Wonder
Substitute the flour with a 1:1 gluten-free baking blend and add an extra egg for structure. The roasted apples actually help mask any weird gluten-free aftertaste, and the extra egg ensures you still get that tender crumb. I've served this to gluten-eating friends who had no idea it was gluten-free until I told them. The key is using a good blend that includes xanthan gum, and don't overmix — gluten-free batters are more delicate.
Storing and Bringing It Back to Life
Fridge Storage
Here's where this bread really shines — it stays moist for up to five days at room temperature wrapped in plastic wrap. Don't refrigerate it unless your kitchen is a sauna, because cold temperatures will dry it out faster than you can say "leftovers." Instead, keep it wrapped tightly on the counter, and if the cut end starts looking a little dry, just trim off a thin slice and pretend it never happened. The flavors actually deepen and improve over the first couple days, making this the perfect make-ahead treat for busy weeks.
Freezer Friendly
This bread freezes like a dream — wrap individual slices in plastic wrap, then aluminum foil, and they'll keep for up to three months. I always make a double batch because having homemade apple bread ready to defrost on a random Wednesday feels like finding money in your coat pocket. To thaw, just leave it on the counter for an hour or pop it in the toaster for instant comfort. Pro tip: freeze slices slightly warm so they don't get icy, and label them because frozen apple bread looks suspiciously like banana bread and nobody likes surprise banana.
Best Reheating Method
Forget the microwave — it turns bread rubbery and sad. Instead, wrap slices in foil and warm them in a 300°F oven for about ten minutes. For an extra treat, spread some butter on top before wrapping so it melts into all the nooks and crannies. If you're in a hurry, the toaster works too, but watch it closely because those roasted apple bits can burn. Add a tiny splash of water before reheating — it steams back to perfection and tastes almost as good as fresh-baked.